wii console instruction manual

Welcome to the Wii Console Instruction Manual! This guide provides essential information for setting up, operating, and maintaining your Wii system. It covers key components, safety precautions, and troubleshooting tips to ensure an optimal gaming experience. From connecting the Wii Remote and Nunchuk to understanding built-in games like Wii Sports, this manual is your comprehensive resource for mastering the Wii console.

Setting Up the Wii Console

Setting up your Wii console is straightforward. Ensure both the Wii and HDTV are powered off, then insert the AV Multi Out plug into the Wii. Follow safety guidelines for a smooth setup process.

2.1. Connecting the Wii Console to Your TV

To connect your Wii console to your TV, first ensure both devices are powered off. Locate the AV Multi Out plug on the Wii and insert it into the corresponding AV input on your TV. Use the AV channel on your TV to select the correct input. For HD TVs, consider using a Wii2HDMI adapter for enhanced video quality. Ensure compatibility with PAL discs for optimal performance.

2.2. Powering On the Wii Console

Plug the power adapter into the Wii console and a nearby electrical outlet. Turn on your TV and select the correct AV channel for the Wii input. Press the power button on the Wii console to turn it on. The Wii Menu will appear on your screen; Ensure the Wii Remote is synced and has working batteries before proceeding. Follow on-screen instructions to complete the initial setup process.

2.3. Syncing the Wii Remote and Nunchuk

Press and hold the sync button on the Wii console until the LED lights flash. Then, press the sync button on the Wii Remote. The LED will stop flashing when synced. For the Nunchuk, plug it into the Wii Remote’s connector. Ensure both devices are properly paired before use. This ensures optimal performance and responsiveness during gameplay. Follow on-screen prompts for any additional pairing instructions if required.

Key Components of the Wii Console

The Wii console includes essential components like the Wii Remote, Nunchuk, Sensor Bar, and Wii Stand for optimal functionality. These parts ensure smooth gameplay and safe operation.

3.1. Wii Remote and Nunchuk

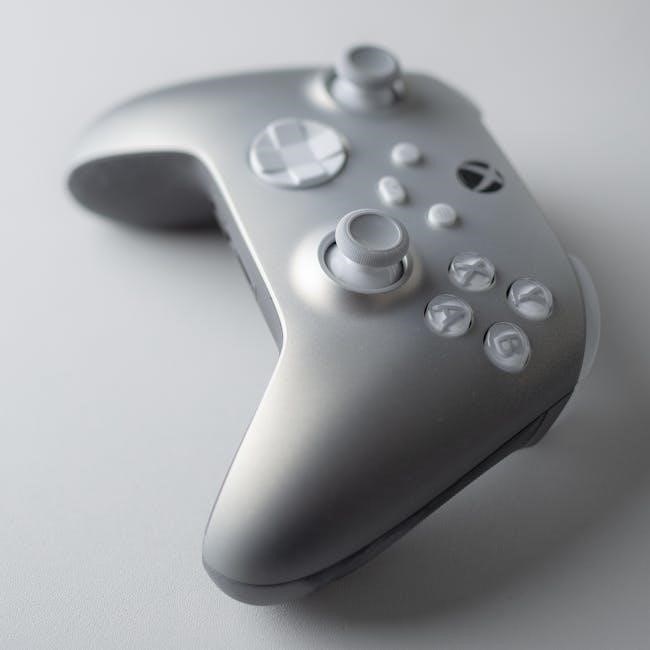
The Wii Remote and Nunchuk are essential controllers designed for intuitive gameplay. The Wii Remote features motion-sensing technology, while the Nunchuk adds analog control for enhanced precision. Together, they provide a versatile gaming experience, allowing players to engage in various Wii Sports and other games with ease and accuracy. Proper syncing ensures optimal performance.

3.2. Sensor Bar

The Sensor Bar is a crucial component for accurate Wii Remote functionality. It emits infrared signals detected by the Wii Remote, enabling precise motion sensing. Place the Sensor Bar above or below your TV and ensure it’s centered for optimal performance. Proper alignment and positioning are essential for accurate gameplay. Follow the manual’s guidelines to set up the Sensor Bar correctly and enhance your Wii gaming experience.

3.3. Wii Console and Stand

The Wii Console and Stand are designed for versatility and stability. The console can be placed horizontally or vertically using the provided stand. Ensure proper ventilation by keeping it away from obstructions. Place the console on a flat, stable surface to prevent overheating and ensure optimal performance. The stand helps maintain balance, reducing the risk of the console tipping over during use. Follow the manual’s placement guidelines for the best gaming experience.

3.4. AV Multi Out and HDMI Adapter

The AV Multi Out jack on the Wii console connects to the AV Multi Out Plug on the Wii2HDMI adapter for HD video output. Ensure both devices are powered off before connecting. This setup enables high-definition display on HDTVs. Follow the manual’s guidelines for proper installation to avoid damage and ensure optimal performance. The HDMI adapter enhances visual quality, providing a clearer gaming experience. Always refer to the manual for specific connection instructions.

3.5. Power Adapter and Batteries

The Wii console comes with a power adapter for connecting to a power source. The Wii Remote requires two AA batteries for operation. Ensure batteries are inserted correctly and use high-quality batteries for optimal performance. Avoid mixing old and new batteries to prevent power issues. Always follow safety guidelines when handling electrical components and batteries to prevent damage or injury. Proper care ensures longevity and reliable functionality of your Wii system.

Safety Precautions

Read this manual carefully to ensure safe and proper use of the Wii system. Avoid overheating by keeping vents clear. Use the Wii Remote safely to prevent injury. Follow battery handling guidelines to maintain performance and avoid damage. Always adhere to health and safety warnings provided in the manual.

4.1; Health and Safety Warnings

Read all warnings carefully before using the Wii system. Avoid playing in uncomfortable positions or for extended periods to prevent fatigue or injury. Ensure proper ventilation to prevent overheating. Keep the Wii Remote and Nunchuk out of reach of children to avoid accidents. Use the wrist strap to prevent accidental throwing. Follow battery handling guidelines to prevent damage or fire hazards. Adhere to all health and safety guidelines for optimal use.

4.2. Proper Handling of the Wii System

Handle the Wii system with care to prevent damage. Avoid exposing it to extreme temperatures, moisture, or physical stress. Clean the console and accessories regularly with a soft cloth. Use only authorized Nintendo accessories to ensure compatibility and safety. Properly insert and remove game discs to avoid scratching. Store the Wii Remote and Nunchuk securely when not in use. Always follow the manual’s guidelines for moving or transporting the console.

Navigating the Wii Menu

Explore the Wii Menu with ease! Access game channels, settings, and the Wii Shop Channel. Use the Wii Remote’s directional buttons or pointer for navigation. Press the Home button to view game instructions or adjust settings. Enjoy a seamless and intuitive experience.

5.1. Understanding the Wii Menu Layout

The Wii Menu is your gateway to gaming, featuring a clean, intuitive design. Channels are displayed as icons on a grid, allowing easy access to games, settings, and apps. The Disc Channel launches games, while the Wii Shop Channel offers downloads. Use the Wii Remote to scroll, select, and navigate. The Home button provides quick access to system settings and game instructions, streamlining your experience.

5.2. Accessing Channels and Settings

To access channels and settings, navigate to the Wii Menu using the Home button on the Wii Remote. Select a channel by pointing and clicking. The Wii Shop Channel allows downloading games, while the Settings menu adjusts system preferences. Parental Controls can be enabled for restrictions. Use the + and ౼ buttons to scroll through options. Organize channels by dragging them into folders. Refer to the manual for detailed instructions on customizing your Wii experience.

Using Wii Accessories

Explore the Wii Remote, Nunchuk, Sensor Bar, and Wii Wheel. Learn their functions and how to use them for enhanced gaming experiences.

6.1. Wii Remote and Nunchuk Functions

The Wii Remote is a motion-sensitive controller with an accelerometer and infrared sensor for precise movement tracking. It features buttons like A, B, and the D-pad for traditional inputs; Use it sideways for classic games or attach the Nunchuk for enhanced control in 3D games. The Nunchuk adds an analog stick and extra buttons, offering more flexibility. Both accessories use AA batteries and must be synced to the Wii console for optimal performance.

6.2. Using the Sensor Bar

The Sensor Bar is essential for accurate Wii Remote tracking. Place it above or below your TV, centered and at the same height as the screen. Ensure it’s not obstructed. The Sensor Bar comes with the Wii console and requires no batteries. Proper placement ensures precise motion sensing, enhancing your gaming experience. Avoid moving it once set up for consistent performance. This setup is crucial for optimal Wii Remote functionality.

Troubleshooting Common Issues

Troubleshoot common Wii issues like remote syncing and display problems. Check connections, sync accessories, and restart the console. Refer to the manual for detailed solutions and support.

7.1. Wii Remote Not Responding

If the Wii Remote isn’t responding, ensure batteries are charged or replaced. Check for proper syncing by pressing the Sync button on both the remote and console. Verify the sensor bar is unobstructed and functioning. Restart the Wii console and try again. If issues persist, test the remote with another Wii console or contact Nintendo support for assistance.

7.2. No Image on the TV Screen

If no image appears on the TV screen, ensure the Wii console is powered on and the AV cables are securely connected to both the Wii and TV. Verify the TV is set to the correct input channel. Check for loose connections or damage to the AV Multi Out plug or HDMI adapter. If using an HDMI adapter, ensure it is compatible with your Wii model. Restart the console and TV to resolve any connectivity issues.

7.3. System Freezing or Crashing

If the Wii system freezes or crashes, restart the console by powering it off, waiting 10 seconds, and turning it back on. Ensure the system software is up-to-date, as outdated software can cause instability. Clear the system cache by going to the Wii Settings > Data Management > System Memory > Clear Cache. If issues persist, perform a system reset by selecting “Format Wii System” in the settings menu, noting this will erase saved data and settings. Contact Nintendo Support if problems continue.

System Updates and Settings

Regularly update your Wii system software to ensure optimal performance and access new features. Navigate to the Wii Settings menu to adjust system preferences and check for updates.

8.1. Updating Wii System Software

To update your Wii system software, go to the Wii Menu, select Wii Settings, and choose Wii System Update. Ensure your console is connected to the internet. Follow on-screen instructions to download and install the latest software. Updates enhance stability, add features, and improve performance. Regular updates are crucial for optimal functionality and accessing new features. Always follow the prompts carefully to avoid interruptions during the update process.

8.2. Adjusting Wii Settings

Access Wii Settings via the Wii Menu to customize your console preferences. Select Wii Settings and navigate through options like screen resolution, audio output, and parental controls. Adjust settings to optimize your gaming experience, such as enabling progressive scan for better video quality or setting time limits for parental control. Save changes to apply them immediately. Regularly reviewing settings ensures your Wii operates according to your preferences and enhances overall performance.

Playing Wii Games

Insert a Wii Game Disc, select the game from the Wii Menu, and enjoy intuitive gameplay using the Wii Remote and Nunchuk for motion-controlled fun.

9.1. Inserting and Playing Game Discs

To play a Wii game, insert the disc with the label facing down into the Wii console’s disc slot. Close the slot, then select the game from the Wii Menu using the Wii Remote. Press the A button to start, or use the B button to view game options. Ensure the disc is clean and handled carefully to avoid damage; Always eject discs properly using the console’s controls.

9.2. Using Wii Sports and Built-In Games

Wii Sports and built-in games demonstrate the Wii console’s unique features. Games like bowling and tennis showcase the Wii Remote’s motion controls. Access these games via the Wii Menu by selecting the game channel and pressing the A button. Perfect for all skill levels, these games provide an entertaining introduction to the Wii’s capabilities. They are ideal for family fun or casual play, highlighting the Wii’s accessibility and innovative design.

Wii Channels and Features

Explore Wii Channels for gaming, news, weather, and more. Access the Wii Shop Channel to download games and apps. Customize your experience with various features and settings.

10.1. Understanding Wii Channels

The Wii Channels are a collection of applications pre-installed on the Wii console; They include the Disc Channel, Wii Shop Channel, Photo Channel, News Channel, Forecast Channel, and Wii Message Board. These channels allow users to access various features such as playing games, downloading content, viewing photos, and receiving notifications. They are easily accessible from the Wii Menu, providing a user-friendly interface for managing and enjoying your Wii experience.

10.2. Accessing the Wii Shop Channel

To access the Wii Shop Channel, navigate to the Wii Menu and select the Shop Channel icon. Ensure your Wii console is connected to the internet. Once connected, you can browse and download WiiWare games, Virtual Console titles, and demos using Wii Points. The channel also provides updates and additional content. If the channel doesn’t load, check your internet connection or restart the Wii console to resolve the issue.

Maintenance and Care

Regularly clean the Wii console and accessories with a soft cloth to prevent dust buildup. Avoid harsh chemicals. Store the console in a cool, dry place, away from direct sunlight. Handle the Wii Remote and Nunchuk with care to prevent damage. Ensure proper ventilation to avoid overheating during extended use. Always follow the manual’s guidelines for maintenance.

11.1. Cleaning the Wii Console

To clean the Wii console, use a soft, dry cloth to wipe away dust and fingerprints. For stubborn marks, dampen the cloth slightly with water, but avoid liquids or harsh chemicals. Never spray cleaning solutions directly onto the console. Clean the vents with compressed air to remove dust buildup. Regular cleaning ensures optimal performance and prevents overheating. Always unplug the console before cleaning for safety.

airemax portable air conditioner manual

Welcome to the AireMax Portable Air Conditioner Manual. This guide provides essential information for safe and efficient operation. Ensure proper installation and maintenance for optimal cooling performance.

1.1 Overview of the AireMax Portable Air Conditioner

The AireMax Portable Air Conditioner is a compact, efficient cooling solution designed for personal spaces. With BTU ratings up to 10,000, it offers powerful cooling while remaining portable. Included accessories like the exhaust hose and remote control enhance convenience, making it ideal for small rooms or offices. This manual guides users through setup, operation, and maintenance for optimal performance and safety.

1.2 Importance of Reading the Manual

Reading the manual is crucial for safe and effective use of the AireMax Portable Air Conditioner. It provides essential safety precautions, installation guidelines, and troubleshooting tips. Understanding the content ensures proper operation, maintenance, and energy efficiency, helping to optimize performance and extend the unit’s lifespan. Adhere to the instructions for best results.

Key Features and Benefits of the AireMax Portable Air Conditioner

The AireMax Portable Air Conditioner offers a 10,000 BTU cooling capacity, portability, energy efficiency, and includes an exhaust hose, window kit, and remote control for convenient operation.

2.1 BTU Rating and Cooling Capacity

The AireMax Portable Air Conditioner features a 10,000 BTU cooling capacity, with a DOE rating of 5,000 BTU, making it suitable for efficiently cooling small to medium-sized rooms.

2.2 Portability and Space-Saving Design

Designed with portability in mind, the AireMax features smooth-rolling wheels and a compact design, allowing easy movement between rooms. Its space-saving construction ensures it fits seamlessly into various interiors without compromising performance or style.

2.3 Energy Efficiency and DOE Rating

The AireMax boasts an energy-efficient design with a DOE rating of 5,000 BTU, ensuring lower power consumption. Its high EER rating optimizes cooling while minimizing energy use, making it an eco-friendly choice for reducing utility bills and environmental impact.

2.4 Included Accessories (Exhaust Hose, Window Kit, Remote Control)

The AireMax includes essential accessories like an exhaust hose, window kit, and remote control. These components simplify installation and operation, allowing for easy setup in various windows and convenient temperature adjustments from anywhere in the room.

Understanding the AireMax Portable Air Conditioner Manual

This section guides you through the manual’s structure, ensuring easy navigation. It covers key symbols, abbreviations, and essential sections for safe and effective use of your AireMax unit.

3.1 Structure and Content of the Manual

The manual is organized into clear chapters, covering installation, operation, and maintenance. It includes safety guidelines, technical specifications, and troubleshooting tips. Detailed diagrams and step-by-step instructions ensure easy understanding. The content is designed to assist both new and experienced users in optimizing their AireMax Portable Air Conditioner’s performance.

3.2 Symbols and Abbreviations Used

The manual uses specific symbols and abbreviations to convey important information. Symbols like warning signs indicate safety precautions, while abbreviations such as BTU (British Thermal Units) and DOE (Department of Energy) rating are explained to ensure clarity. These elements help users understand technical details and operate the unit safely and efficiently.

Safety Precautions and Guidelines

Ensure your safety and the unit’s by following guidelines. Proper grounding, ventilation, and electrical precautions are crucial. Avoid overheating and keep the area clear to prevent hazards and ensure efficient operation.

4.1 General Safety Tips

Always place the unit on a firm, level surface away from flammable materials. Ensure proper ventilation and avoid overloading electrical circuits. Regularly inspect the power cord and avoid using damaged hoses. Follow all safety guidelines in the manual to ensure safe and efficient operation of your AireMax portable air conditioner.

4.2 Electrical Safety and Grounding Instructions

Ensure the unit is properly grounded using a 3-prong outlet. Avoid using extension cords or damaged power cords. Keep the air conditioner away from water to prevent electrical hazards. Always follow grounding instructions in the manual to maintain safety and prevent potential electrical risks during operation.

4.3 Ventilation Requirements

Proper ventilation is crucial for efficient cooling. Use the exhaust hose and window kit to expel hot air outside. Inadequate airflow can reduce cooling performance and potentially damage the unit. Ensure vents remain unobstructed and consult the manual for specific ventilation recommendations to maintain optimal operation and safety.

Installation and Setup Instructions

This section guides you through unpacking, connecting the exhaust hose, installing the window kit, and positioning the unit for optimal cooling and safety.

5.1 Unpacking and Inspecting the Unit

Carefully unpack the AireMax Portable Air Conditioner and inspect for damage. Ensure all accessories, including the exhaust hose, window kit, and remote control, are included. Contact customer support if any parts are missing or damaged during shipment.

5.2 Connecting the Exhaust Hose

Attach the exhaust hose connector to the exhaust hose and align it with the unit’s exhaust port. Secure it firmly to ensure a tight seal. Connect the other end of the hose to the window kit. Ensure all connections are snug to prevent air leaks during operation.

5.3 Installing the Window Kit

To install the window kit for your AireMax Portable Air Conditioner:

Open the window slightly to about 4-6 inches as recommended.

Assemble the window kit if necessary, using the provided parts from the box.

Extend the adjustable sides of the window kit to fit your window’s width, ensuring a snug but not overly tight fit.

Secure the frame in the window opening, using latches or screws as instructed in the manual to prevent movement.

Attach the exhaust hose to the window kit, ensuring a secure connection with clamps or locking mechanisms.

Seal any gaps around the window frame using weatherstripping or provided seals to prevent air leaks.

Test the installation by turning on the air conditioner and checking that hot air is expelled outside without any leakage back into the room.

Follow safety guidelines and avoid modifying the window kit or using it in unauthorized ways.

Refer to specific instructions in the manual for different window types (e.g., sliding, casement).

Maintain the window kit by cleaning it regularly to ensure proper airflow and efficiency.

By following these steps, you can ensure a proper installation that enhances the performance and safety of your AireMax Portable Air Conditioner.

5.4 Placing the Unit in the Desired Location

Position the AireMax Portable Air Conditioner on a firm, level surface away from direct sunlight. Ensure the unit is at least 12 inches from any walls or obstructions for proper airflow. Keep it near a window for venting and avoid placing it in damp or humid areas.

  • Choose a location with easy access to an electrical outlet.
  • Avoid carpeted floors to prevent dust accumulation.
  • Ensure the unit is stable to prevent vibration or movement.

Operating the AireMax Portable Air Conditioner

Press the power button to turn on the unit. Adjust temperature and fan settings using the control panel or remote. Monitor the digital display for current settings and ensure proper ventilation for efficient cooling.

  • Always vent the unit to the outside for optimal performance.
  • Avoid extreme temperature settings to save energy.

6.1 Turning On the Unit

To power on the AireMax Portable Air Conditioner, plug it into a grounded outlet and press the power button. The digital display will light up, and the fan will start automatically. Ensure the unit is properly vented before operation for optimal cooling performance.

6.2 Adjusting Temperature and Fan Settings

Use the control panel or remote to adjust temperature and fan settings. Set your desired temperature between 61°F and 90°F. Choose from three fan speeds—low, medium, or high—for personalized comfort. Adjusting these settings ensures efficient cooling and optimal air circulation in your space.

6.3 Using the Remote Control

To use the remote control effectively, ensure it is paired with the unit upon initial setup. Maintain a clear line of sight for the infrared signal to function reliably. Explore advanced features like eco-mode or turbo mode for enhanced energy efficiency and performance. Customize settings for various scenarios or personal preferences to optimize comfort, convenience, and control.

6.4 Understanding the Control Panel

The control panel features intuitive buttons for temperature, fan speed, and mode selection. Use the LED display to monitor settings and navigate through options. Familiarize yourself with touch-sensitive buttons for seamless operation. Ensure the remote control is within range for optimal functionality and convenience.

Maintenance and Cleaning Tips

Regular maintenance ensures optimal performance. Clean the air filter, drain condensate water, and store the unit properly during off-season. Follow these steps to prolong lifespan and efficiency.

7.1 Cleaning the Air Filter

Cleaning the air filter is essential for maintaining efficiency. Turn off the unit, remove the filter, and gently wash it with warm water. Allow it to dry completely before reinstalling. Regular cleaning prevents dust buildup and ensures optimal airflow and cooling performance.

7.2 Draining Condensate Water

Regularly drain condensate water to prevent leaks and mold growth. Check the water tank and empty it when full. Use the drainage hose or bucket provided. Ensure proper drainage to maintain efficiency and avoid water damage. Refer to the manual for specific drainage instructions for your AireMax model.

7.3 Storing the Unit During Off-Season

Properly store your AireMax Portable Air Conditioner during off-season to maintain its efficiency. Clean and dry the unit thoroughly, ensuring no moisture remains. Store in the original packaging or a protective cover in a cool, dry place. Keep the remote and accessories with the unit for easy access next season.

Troubleshooting Common Issues

This section addresses common issues with your AireMax Portable Air Conditioner, such as no power, insufficient cooling, or unusual noises, providing quick solutions to ensure optimal performance and safety.

8.1 No Power or Unit Not Turning On

If the AireMax Portable Air Conditioner won’t turn on, check the power cord for damage or looseness. Ensure it’s properly plugged into a grounded outlet. Verify the circuit breaker hasn’t tripped and avoid overloading the circuit. Check for proper grounding and inspect the power button for functionality. If issues persist, contact AireMax support.

8.2 Insufficient Cooling or Leaks

If the AireMax Portable Air Conditioner isn’t cooling properly or leaking, ensure the exhaust hose is securely connected and unblocked. Check for proper window kit installation to prevent air leaks. Verify the unit is sized correctly for the room and ensure the air filter is clean. Inspect for condensate water drainage issues and tighten any loose connections to resolve leaks.

8.3 Strange Noises or Odors

If unusual noises or odors occur, check for blockages in the exhaust hose or air filter. Ensure proper ventilation and inspect for mold or mildew buildup. Verify the unit is level and all internal components are secure. Consult the manual for troubleshooting or contact customer support for assistance.

Remote Control Functions and Features

The remote control offers convenient operation, allowing users to adjust settings, activate timer and sleep modes, and monitor temperatures effortlessly. Ensure proper pairing for seamless functionality.

9.1 Pairing the Remote with the Unit

To pair the remote, ensure the air conditioner is turned off. Press and hold the remote’s “Pair” button until the unit’s LED flashes. Release and wait for confirmation. This establishes a secure connection for remote operation, ensuring smooth control of all functions. Proper pairing is essential for optimal performance.

9.2 Navigating Through Remote Settings

Use the remote’s directional buttons to navigate through settings. Adjust temperature, fan speed, and mode with ease. Press “MODE” to cycle between cool, fan, and dry modes. Utilize the “TIMER” and “SLEEP” buttons for convenient operation. The LCD display shows current settings for clear monitoring and control.

9.3 Using Timer and Sleep Mode

Set the timer to automatically turn the unit on or off within a 24-hour period. Activate sleep mode to reduce noise and conserve energy during nighttime. Press the “TIMER” button to select duration and the “SLEEP” button for energy-saving operation. These features enhance convenience and efficiency while maintaining optimal comfort levels.

Energy Efficiency and Cost Savings

The AireMax portable air conditioner features a high DOE rating, ensuring energy efficiency. With its 10,000 BTU cooling capacity, it minimizes energy consumption, reducing operational costs and environmental impact effectively.

10.1 Understanding DOE Rating

The DOE (Department of Energy) rating measures the energy efficiency of appliances. For the AireMax portable air conditioner, it indicates the unit’s energy consumption relative to its cooling capacity, ensuring compliance with energy standards.

A higher DOE rating signifies better energy efficiency, reducing operational costs. The AireMax model’s 10,000 BTU cooling capacity, with a 5,000 BTU DOE rating, balances performance and energy savings, making it an eco-friendly choice for cooling needs.

10.2 Tips for Reducing Energy Consumption

To minimize energy use with your AireMax portable air conditioner, adjust the thermostat to a moderate setting and use the timer function. Proper installation of the window kit ensures efficient cooling, reducing unnecessary energy waste.

  • Set the thermostat between 68-72°F for optimal efficiency.
  • Use the remote control to monitor and adjust settings.
  • Regularly clean the air filter to maintain airflow.

10.3 EER and SEER Ratings Explained

EER (Energy Efficiency Ratio) and SEER (Seasonal Energy Efficiency Ratio) measure cooling efficiency. EER is cooling capacity per energy consumed at fixed temperatures, while SEER averages efficiency over a season. Higher ratings indicate better energy use, helping reduce utility costs and environmental impact.

  • EER: Cooling capacity (BTUs) divided by energy input (Watts).
  • SEER: Measures efficiency over varying temperatures.

Technical Specifications and Compatibility

This section outlines the AireMax Portable Air Conditioner’s technical specifications, including BTU rating, dimensions, weight, and compatibility with various room sizes for optimal performance.

11.1 Dimensions and Weight

The AireMax Portable Air Conditioner features compact dimensions designed for portability. Its sturdy construction ensures durability while maintaining a lightweight design. Specific measurements and weight are detailed in the manual, ensuring compatibility with various spaces. The unit is built for efficiency and ease of movement, making it ideal for different room setups.

11.2 Noise Levels and Operation Modes

The AireMax Portable Air Conditioner is designed to operate quietly, ensuring minimal disruption. It features multiple operation modes, including cooling, fan, and dehumidify. The manual provides detailed guidance on each mode, helping users optimize performance for different environments and ensuring efficient operation.

11.3 Compatibility with Different Room Sizes

The AireMax Portable Air Conditioner is versatile, suitable for various room sizes. It efficiently cools spaces up to 450 square feet, making it ideal for bedrooms, living areas, or offices. The unit’s compact design ensures compatibility with diverse room dimensions while maintaining optimal cooling performance.

12.2 Importance of Proper Usage and Maintenance

The AireMax Portable Air Conditioner Manual provides comprehensive guidance for optimal performance. Proper usage and maintenance ensure efficiency, safety, and longevity, making it a reliable cooling solution for various spaces.

graco extend2fit convertible car seat manual

Welcome to the Graco Extend2Fit Convertible Car Seat manual, your comprehensive guide to safe and proper installation, featuring key functions like Extend2Fit and UV protection canopy.

1.1 Overview of the Graco Extend2Fit Convertible Car Seat

The Graco Extend2Fit Convertible Car Seat is a versatile and safe solution for your child’s travel needs. Designed for both rear-facing and forward-facing use, it accommodates children from infancy through early childhood. The seat features an extendable leg and adjustable harness for optimal comfort and safety. With a built-in UV protection canopy and easy installation options, it ensures convenience for parents. Compliant with UN Reg. 129 (i-Size), it meets rigorous safety standards, making it a reliable choice for families on the go.

1.2 Importance of Reading the Manual

Reading the Graco Extend2Fit Convertible Car Seat manual is crucial for ensuring your child’s safety and proper use of the seat; The manual provides detailed instructions for installation, adjustment, and maintenance, helping you understand all features and functions. It also outlines safety precautions and compliance with regulations like UN Reg. 129 (i-Size). By following the manual, you can ensure a secure fit, optimal comfort, and adherence to safety standards. Proper use of the seat is essential to protect your child in the event of an accident. Safety should never be compromised, and the manual is your guide to achieving it.

Installation Guide

The Graco Extend2Fit Convertible Car Seat offers flexible installation options using LATCH or vehicle seat belts. Always refer to your vehicle’s manual for the best seating position.

2.1 Forward-Facing Installation

For forward-facing installation, ensure your child is at least 2 years old and weighs between 22-65 lbs. Secure the Graco Extend2Fit using either LATCH or vehicle seat belts. Tighten the harness snugly and ensure the car seat is properly leveled using the built-in level indicator. Always refer to your vehicle’s manual for the recommended seating position and follow the car seat’s instructions for securing the seat belt or LATCH connectors. Proper installation ensures your child’s safety and comfort during travel.

2.2 Rear-Facing Installation

The Graco Extend2Fit supports rear-facing installation for children weighing 4-50 lbs and up to 50 inches tall. Ensure the car seat is securely positioned using LATCH or vehicle seat belts. Tighten the straps and verify the seat is level using the built-in indicator. Always consult your vehicle’s manual for the best installation location. Proper rear-facing installation is crucial for safety, as it better protects your child’s head and neck in the event of a crash. Follow the manual’s step-by-step guide for a secure and correct setup.

2.3 Using LATCH vs. Vehicle Seat Belts

The Graco Extend2Fit can be installed using LATCH (Lower Anchors and Tethers for Children) or vehicle seat belts. LATCH provides a quick and secure installation, ideal for vehicles equipped with anchor points. For vehicles without LATCH, seat belts offer a reliable alternative. Ensure the car seat is tightly secured with minimal movement. The LATCH system has a weight limit of 65 lbs, while seat belts can be used up to the seat’s full capacity. Always refer to your vehicle’s manual for specific instructions and compatibility. Proper use ensures maximum safety for your child.

Key Features of the Graco Extend2Fit

Explore the Graco Extend2Fit’s key features, designed for safety and comfort. It includes an extendable fit, built-in UV protection canopy, and supports children up to 50 pounds.

3;1 Extend2Fit Functionality

The Extend2Fit functionality allows for extended legroom, providing extra comfort for your child as they grow. This feature ensures proper posture and reduces the risk of discomfort during long trips. The seat can be adjusted easily, accommodating children from infancy through early childhood. With a simple mechanism, parents can extend the seat’s length, ensuring optimal support without compromising safety. This innovative design makes the Graco Extend2Fit a practical choice for families seeking durability and adaptability in a car seat.

3.2 Built-In UV Protection Canopy

The Graco Extend2Fit features a built-in UV protection canopy, designed to shield your child from harmful sun rays during travels. This canopy provides excellent coverage, reducing glare and preventing overheating. Its adjustable design allows parents to customize the shade for optimal comfort. The UV protection canopy is durable and easy to clean, ensuring long-term use. This feature is especially useful for children sensitive to sunlight, making it a practical addition to the car seat’s safety and comfort offerings.

3.3 Weight and Height Limits

The Graco Extend2Fit Convertible Car Seat accommodates children within specific weight and height ranges. Rear-facing mode is suitable for children weighing 4-40 lbs and up to 43 inches tall. Forward-facing mode supports children from 22-65 lbs and up to 49 inches tall. The booster mode, when used with the vehicle seat belt, is designed for children weighing 40-100 lbs and up to 57 inches tall. Always refer to the manual for precise limits to ensure safe and proper use of the car seat for your child’s growth stage.

Safety Standards and Certification

The Graco Extend2Fit Convertible Car Seat meets rigorous safety standards, including compliance with UN Reg. 129 (i-Size) and Federal Motor Vehicle Safety Standards (FMVSS 213).

4.1 Compliance with UN Reg. 129 (i-Size)

The Graco Extend2Fit Convertible Car Seat complies with UN Reg. 129 (i-Size), ensuring enhanced safety and compatibility with i-Size vehicle seating positions. This standard emphasizes rear-facing travel for children up to 105 cm tall, providing optimal crash protection and side impact performance. Compliance guarantees proper fit in i-Size-approved vehicles and accommodates growing children with extended legroom. The seat is rigorously tested to meet strict safety criteria, offering parents confidence in its reliability and performance. Always refer to the manual for specific installation guidelines under this standard.

4.2 Crash Testing and Safety Ratings

The Graco Extend2Fit Convertible Car Seat undergoes rigorous crash testing to ensure superior protection for children. It meets or exceeds federal safety standards and has received high safety ratings for its performance in front and side impacts. The seat’s robust design and advanced materials provide exceptional crashworthiness, while its adjustable features enhance proper fit and stability. Parents can trust the Extend2Fit’s reliability, as it consistently ranks among top-rated car seats for safety and durability. Regular updates and certifications ensure it remains a leader in child passenger safety.

Maintenance and Cleaning

Regularly clean the Graco Extend2Fit Convertible Car Seat using mild detergent and water. Avoid harsh chemicals or bleach to preserve fabric integrity. Store in a dry, cool place when not in use to maintain quality and safety standards.

5.1 Cleaning the Car Seat Fabric

To maintain the Graco Extend2Fit Convertible Car Seat’s quality and safety, clean the fabric regularly. Use a mild detergent and lukewarm water for spot cleaning. Avoid bleach or harsh chemicals, as they may damage the material. Gently scrub stains with a soft cloth, then rinse and air dry. For deeper cleaning, remove the seat cover and machine wash it on a gentle cycle, if permitted. Always refer to the manual for specific washing instructions to ensure the fabric remains durable and safe for your child.

5.2 Storage and Transportation Tips

Proper storage and transportation of the Graco Extend2Fit Convertible Car Seat are essential to maintain its safety and functionality. Store the seat in a dry, cool place away from direct sunlight to prevent damage. When transporting, use the original packaging or a sturdy bag to protect it from scratches or dents. Avoid exposing the seat to extreme temperatures or leaving it in a hot vehicle for extended periods. Always ensure the seat is securely fastened during transport to prevent movement. Keep the manual with the seat for easy reference during reinstallation.

Troubleshooting Common Issues

Common issues include harness malfunctions and recline position difficulties. Refer to the manual for detailed solutions to ensure safe and proper functionality of the car seat.

6.1 Recline Position Adjustment

Troubleshooting recline position issues is essential for optimal safety and comfort. Ensure the car seat is on a level surface and check the recline indicator. If the seat is not reclining properly, refer to the manual for adjustment steps. Verify that the recline mechanism is not obstructed and that all bolts or levers are securely tightened. For persistent issues, consult the user manual for detailed instructions or contact Graco customer support for assistance. Proper recline adjustment ensures correct installation and safe usage of the car seat.

6.2 Harness and Buckle Malfunction

If the harness or buckle malfunctions, ensure the car seat is not in use until repaired. Check for tangled straps or debris in the buckle. Clean the buckle gently with a soft cloth and avoid using harsh chemicals. If the issue persists, refer to the manual for guidance or contact Graco customer support. Proper harness and buckle function is critical for your child’s safety, so address any malfunctions promptly to ensure secure and correct usage of the car seat.

Additional Resources

For further assistance, visit the Graco website for downloadable manuals, video guides, and customer support. Explore troubleshooting tips and FAQs to enhance your car seat experience.

7.1 Downloading the User Manual

The Graco Extend2Fit Convertible Car Seat manual is available for free download on the official Graco website. It provides detailed instructions for installation, safety features, and maintenance. The manual is categorized under car seats and has been rated by users, ensuring reliability. It includes step-by-step guides for forward and rear-facing setups, LATCH usage, and recline adjustments. Downloading the manual is essential for understanding the Extend2Fit functionality, weight limits, and troubleshooting common issues. Visit Graco’s official site to access this resource and ensure proper usage of your car seat.

7.2 Video Tutorials and Guides

Graco offers video tutorials and guides to assist with the Extend2Fit Convertible Car Seat. These resources, available on platforms like YouTube, provide visual step-by-step instructions for installation, adjustment, and maintenance. Videos cover both forward and rear-facing setups, LATCH usage, and recline adjustments. They also include troubleshooting tips for common issues like harness malfunctions. These guides complement the manual, offering a comprehensive understanding of the car seat’s features and ensuring proper usage for optimal safety. They are an excellent resource for first-time users or those needing visual clarification.

delta ms300 manual

The Delta MS300 manual provides a comprehensive guide for installing, operating, and maintaining the MS300 Series Standard Compact Drive, ensuring optimal performance and safety compliance․

Overview of the MS300 Series

The Delta MS300 Series is a line of high-performance, compact AC motor drives designed for industrial automation applications․ These drives are engineered to provide precise speed control, high efficiency, and reliable operation in various industrial environments․ The MS300 Series is part of Delta’s portfolio of advanced motor control solutions, offering a user-friendly interface and robust functionality․ It is suitable for applications requiring variable speed control, such as pumps, fans, and conveyors․ With its compact design and versatile configuration options, the MS300 Series is ideal for integrating into industrial systems, ensuring optimal performance and energy savings․ It is widely recognized for its durability and adaptability in meeting diverse industrial needs․

Key Features of the MS300 Drive

The MS300 drive offers advanced features such as high-speed communication interfaces, programmable parameters, and built-in PID control, enabling precise motor control and efficient system integration․ Its compact design maximizes space savings while maintaining high performance․ The drive supports multiple control modes, including V/F control and vector control, catering to various application requirements․ Enhanced protection features, such as overcurrent and overvoltage protection, ensure operational reliability․ Additionally, the MS300 drive supports energy-saving operations through its efficient power management system․ These features make it a versatile and reliable choice for industrial automation, suitable for applications ranging from simple speed control to complex motion systems, ensuring optimal performance and durability in demanding environments․

Safety Guidelines and Precautions

Always disconnect power before wiring or servicing․ Avoid high-temperature environments and ensure proper grounding․ Follow manual instructions to prevent equipment damage or personal injury during installation and operation;

Important Safety Instructions

The Delta MS300 manual emphasizes critical safety precautions to ensure safe installation and operation․ Always disconnect power before performing any wiring or maintenance tasks․ Avoid installing the drive in high-temperature environments or areas prone to humidity․ Proper grounding is essential to prevent electrical hazards․ Never touch live components or attempt to modify the drive, as this can lead to serious injury or equipment damage․ Use appropriate tools and follow the manual’s guidelines strictly․ Keep flammable materials away from the installation site․ Failure to comply with these instructions may result in equipment malfunction, personal injury, or void the warranty․ Adherence to these precautions is vital for optimal performance and safety․ Always refer to the manual for detailed guidelines before proceeding with any setup or maintenance activities․

Installation and Wiring Precautions

The Delta MS300 manual outlines essential precautions for safe and proper installation and wiring․ Ensure the power supply is disconnected before starting any wiring tasks to prevent electrical shocks․ Use the correct wire sizes and ensure all connections are secure to avoid short circuits․ Proper grounding of the drive is mandatory to prevent damage from voltage spikes․ Avoid installing the drive in areas with high temperatures or humidity, as this can affect performance and lifespan․ Use appropriate connectors and follow the manual’s wiring diagrams to ensure compatibility․ Double-check all connections before powering up the system․ Failure to adhere to these guidelines may result in equipment damage or operational issues․ Always refer to the manual for specific wiring instructions tailored to your application․

System Requirements and Compatibility

The Delta MS300 drive is compatible with various industrial automation systems, ensuring seamless integration and optimal performance across a wide range of applications and configurations․

Technical Specifications of the MS300

The Delta MS300 Series Standard Compact Drive features high-performance capabilities, including advanced motor control algorithms, high-speed communication interfaces, and robust design for industrial environments․ It supports various motor types and offers adjustable frequency outputs for precise control․ The drive is equipped with built-in protection mechanisms such as overcurrent, undervoltage, and thermal protection․ It operates within a wide voltage range and is designed for efficient energy use․ The MS300 series also includes customizable settings for specific applications, ensuring flexibility and adaptability to different industrial needs․ These specifications make the MS300 a reliable choice for industrial automation and motor control systems․

Compatibility with Industrial Automation Systems

The Delta MS300 Series is designed to seamlessly integrate with various industrial automation systems, ensuring compatibility with a wide range of control and monitoring platforms․ It supports multiple communication protocols such as Modbus, CANopen, and EtherCAT, enabling efficient data exchange and system integration․ The drive is compatible with popular industrial control systems (ICS) and programmable logic controllers (PLC), making it a versatile solution for diverse industrial applications․ Additionally, the MS300 series can be easily incorporated into existing factory automation frameworks, providing enhanced operational efficiency and scalability․ Its compatibility ensures smooth integration with modern industrial systems, facilitating advanced automation and control capabilities․ This makes the MS300 series a preferred choice for industrial automation environments․

Quick Installation Guide

Power on the MS300 drive and follow the quick setup process for variable speed control․ Refer to the manual for advanced configuration and detailed instructions․

Step-by-Step Installation Process

  1. Unpack and prepare: Carefully unpack the MS300 drive and ensure all components are included․ Prepare the installation area, ensuring it is clean and dry․
  2. Mount the drive: Securely mount the MS300 on a flat surface using screws․ Ensure proper ventilation to avoid overheating․
  3. Disconnect power: Before wiring, disconnect the power supply to prevent electrical shock or damage to sensitive components․
  4. Connect terminals: Connect the input and output terminals according to the manual․ Double-check all connections for accuracy․
  5. Connect control signals: Attach control signals and sensors as specified in the manual․ Ensure all wiring is secure and properly insulated․
  6. Power on and set up: Reconnect the power supply and turn on the drive; Follow the quick setup process for variable speed control․
  7. Test the system: Verify proper operation by testing motor speed and control functions․ Refer to the manual for troubleshooting common issues․

Follow these steps carefully to ensure safe and effective installation of the Delta MS300 drive․

Power Connection and Initial Setup

Connect the power supply to the MS300 drive, ensuring the voltage matches specifications․ Turn on the power and follow the startup sequence․ Use the control panel to set basic parameters such as motor speed and acceleration․ Refer to the manual for detailed instructions on initializing the drive and configuring essential settings․ Proper power connection and initial setup are crucial for safe operation and optimal performance․

Advanced Setup and Configuration

The MS300 drive offers advanced features for customizing motor control, including parameter tuning and function customization․ Refer to the manual for detailed calibration and setup instructions․

Calibration and Parameter Settings

The Delta MS300 manual provides detailed instructions for calibration and parameter settings to ensure precise motor control․ Calibration involves adjusting drive parameters to match the motor specifications, optimizing performance․ Users can customize settings such as speed, torque, and acceleration through the control panel or software tools; The manual outlines step-by-step procedures for parameter configuration, ensuring accurate and efficient setup․ Proper calibration is essential for maintaining stability and preventing operational errors․ Refer to the manual for specific guidelines and troubleshooting tips to achieve optimal drive functionality;

Customizing Drive Functions for Specific Applications

The Delta MS300 manual guides users in customizing drive functions to meet specific application requirements․ Adjustable parameters include speed, torque, and acceleration, allowing tailored performance for diverse industrial needs․ Users can modify settings via the control panel or external software, ensuring precise control over motor operations․ The manual details how to configure custom profiles for applications like pumping, conveyors, or fans․ Advanced features enable synchronization with industrial automation systems, enhancing flexibility and efficiency․ By adapting drive functions to specific tasks, users can optimize productivity and reduce operational errors․ The manual provides step-by-step instructions for customization, ensuring safe and effective implementation of tailored drive configurations․

Troubleshooting Common Issues

The Delta MS300 manual helps identify and resolve common errors, providing diagnostic tools and solutions to ensure smooth operation and minimize downtime in industrial applications․

Identifying and Resolving Common Errors

The Delta MS300 manual details common errors and their solutions, ensuring efficient troubleshooting․ Error codes like E001 to E012 are explained, with specific causes and repair actions․ Overheating, often due to high ambient temperatures or insufficient cooling, can trigger alarms․ Users are advised to check wiring connections and ensure proper ventilation․ For motor-related issues, recalibrating parameters or adjusting speed settings may resolve problems․ The manual emphasizes consulting the error code list for precise solutions, minimizing downtime in industrial applications․ Regular maintenance and adherence to safety guidelines are also stressed to prevent recurring issues․ This section empowers users to diagnose and fix problems independently, ensuring optimal drive performance․

Understanding Error Codes and Solutions

The Delta MS300 manual includes a detailed section on error codes, providing clear explanations and solutions․ Common errors like E001 to E012 are listed, each with specific causes and repair steps․ For example, E001 indicates a power-related issue, while E005 signals an overheating problem․ The manual guides users to check power connections or ensure proper cooling for E001 and to verify ambient temperature and ventilation for E005․

By understanding these codes, users can quickly diagnose and resolve issues, minimizing downtime․ The manual also advises resetting the drive or adjusting parameters as needed․ Regular checks and adherence to maintenance guidelines can prevent recurring errors, ensuring smooth operation․

Maintenance and Support

Regular maintenance ensures optimal performance of the MS300․ Users can access technical support, manuals, and resources online for troubleshooting and updates, enhancing operational efficiency and reliability․

Routine Maintenance for Optimal Performance

Regular maintenance is crucial for ensuring the MS300 drive operates at peak efficiency․ Start by disconnecting power before performing any maintenance tasks to ensure safety․ Clean dust and debris from the unit to prevent overheating․ Inspect all connections and wiring for signs of wear or damage, addressing issues promptly․ Check for firmware updates and install the latest version to maintain performance and compatibility․ Refer to the manual for detailed maintenance schedules and procedures tailored to your specific application․ Proper upkeep not only extends the lifespan of the drive but also minimizes downtime and ensures reliable operation in industrial environments․ Always follow Delta’s guidelines for optimal results․

Accessing Technical Support and Resources

For assistance with the MS300 Series, Delta offers comprehensive technical support and resources․ The official Delta website provides access to downloadable PDF manuals, guides, and specifications․ Users can refer to the user manual for detailed troubleshooting guides and technical specifications․ Additionally, Delta’s customer support team is available to address specific inquiries or issues․ Visit the Delta Electronics website for direct links to resources, including operation manuals and installation guides․ For further assistance, contact Delta’s support team through the provided contact information in the manual․ These resources ensure users can resolve issues efficiently and stay updated with the latest product information and updates․

The Delta MS300 manual serves as a comprehensive guide, ensuring users can effectively install, operate, and maintain the MS300 Series drive․ By adhering to safety guidelines and best practices outlined in the manual, users can achieve optimal performance and longevity of the device․ The document provides detailed instructions for troubleshooting and advanced configurations, empowering users to resolve issues efficiently․ Additionally, Delta offers technical support and resources, further enhancing the user experience․ This manual is an invaluable resource for anyone working with the MS300 Series, helping them unlock its full potential and integrate it seamlessly into industrial automation systems․

rodgers white thermostat manual

Your Rodgers White Thermostat Manual is a comprehensive guide to understanding and optimizing your heating and cooling system. It provides detailed instructions for installation, programming, and maintenance, ensuring efficient and user-friendly control of your home’s temperature. This manual is designed to help you make the most of your thermostat’s advanced features while addressing common issues and troubleshooting steps. Explore the sections to master your thermostat’s functionality and enjoy a comfortable living environment year-round.

Overview of the Rodgers White Thermostat

The Rodgers White Thermostat is a digital, microcomputer-controlled device designed for precise time and temperature management. It offers compatibility with various HVAC systems, including single-stage gas, oil, electric, and heat pump configurations. The thermostat features a user-friendly interface for programming daily schedules and adjusting temperature settings. It supports automatic mode switching between heating and cooling, ensuring efficient energy use. With optional outdoor sensor integration, it can adapt to external conditions, enhancing comfort and energy savings. This versatile thermostat is suitable for both residential and light commercial applications, providing reliable performance and advanced control options.

Importance of Reading the Manual

Reading the Rodgers White Thermostat Manual is essential for understanding its features, proper installation, and optimal use. It provides detailed instructions for configuring compatible HVAC systems, programming schedules, and troubleshooting common issues. The manual ensures safe and efficient operation, helping you avoid costly mistakes. By following the guidelines, you can maximize energy savings and extend the thermostat’s lifespan. Familiarizing yourself with the manual enables you to utilize advanced features like automatic mode switching and outdoor sensor integration effectively. This knowledge empowers you to maintain comfort and efficiency in your home seamlessly.

Installation Guidelines

Installation requires turning off power, removing the old thermostat, and following wiring instructions carefully. Mount the new thermostat level and connect wires according to the manual. Ensure compatibility with your HVAC system for proper functionality.

Pre-Installation Checks

Before installing your Rodgers White thermostat, ensure the power to your HVAC system is turned off. Verify compatibility with your heating and cooling system, checking if it supports single or multi-stage operations. Review the wiring diagram in the manual to identify necessary connections. Familiarize yourself with the thermostat’s components, such as the outdoor sensor and system switch. Ensure all tools are ready, and the area is clear for a smooth installation process. Proper preparation guarantees a safe and efficient setup.

Step-by-Step Installation Process

Begin by turning off the power to your HVAC system. Mount the thermostat on a wall with the provided hardware. Connect the wires according to the wiring diagram in the manual, ensuring correct terminal assignments. Secure the wires and close the thermostat cover. Turn the power back on and test the system to ensure proper operation. Finally, program your desired settings and verify functionality. Follow these steps carefully to ensure a successful installation and optimal performance of your Rodgers White thermostat;

System Wiring Requirements

Ensure your system meets Class II circuit requirements. Connect the thermostat wires to the appropriate terminals, following the wiring diagram in the manual. Verify compatibility with your HVAC system’s wiring configuration. Secure all connections tightly to avoid malfunctions. If unsure, consult a professional. Proper wiring ensures safe and efficient operation of your Rodgers White thermostat, preventing potential issues and ensuring reliable performance. Always adhere to the manufacturer’s guidelines for a secure and correct installation.

Understanding System Configuration

Learn how to configure your Rodgers White thermostat for compatibility with various HVAC systems, including heat pumps and gas furnaces, ensuring optimal performance and efficiency.

Compatible HVAC Systems

The Rodgers White thermostat is designed to work seamlessly with a variety of HVAC systems, including single-stage gas, oil, and electric furnaces, as well as heat pumps. It supports configurations like SINGLE STAGE gas systems, HEAT PUMP TYPE 1 (HP 1), and multi-stage setups. This versatility allows you to customize your heating and cooling solutions to match your home’s specific needs. Ensure compatibility by referring to the manual for detailed system requirements and configurations.

Heat Pump and Gas Furnace Configuration

The Rodgers White thermostat supports configurations that integrate heat pumps with gas furnaces for optimal performance. When an outdoor sensor is installed, you can set a threshold temperature to automatically switch from the heat pump to the gas furnace during colder conditions. This dual-system setup enhances efficiency and ensures reliable heating. The thermostat allows seamless transitions between systems, minimizing energy consumption while maintaining comfort. Refer to the manual for specific configuration instructions tailored to your HVAC setup.

Single Stage vs. Multi-Stage Systems

The Rodgers White thermostat is compatible with both single-stage and multi-stage HVAC systems. Single-stage systems operate at full capacity, making them ideal for straightforward setups. Multi-stage systems offer variable operation, enhancing efficiency and temperature consistency. The thermostat’s flexibility ensures optimal performance across different configurations, whether you’re using a single-stage gas furnace or a multi-stage heat pump. This adaptability allows homeowners to choose the system that best fits their needs for comfort and energy savings.

Programming the Thermostat

Discover how to program your Rodgers White thermostat to create customized heating and cooling schedules. Utilize the microcomputer technology for precise temperature control and energy efficiency. Learn to set daily routines, adjust settings, and enable automatic mode switching for seamless operation. This section guides you in tailoring your thermostat to your lifestyle.

Setting Up Daily Schedules

Setting up daily schedules on your Rodgers White thermostat allows you to customize your heating and cooling preferences for different times of the day. Follow the on-screen prompts to create a 5-day, 2-day, or 1-day schedule. Select the wake, leave, return, and sleep times to optimize energy usage. Adjust the temperature settings for each period to maintain comfort while saving energy. For consistency, you can copy settings across multiple days. Additionally, enable the vacation mode to maintain energy efficiency while you’re away. This feature ensures your system runs efficiently without constant manual adjustments.

Temperature Control Options

The Rodgers White thermostat offers advanced temperature control options to suit your comfort needs. You can set precise temperature levels for heating and cooling modes, with adjustments in 1-degree increments. The hold function allows you to override the schedule and maintain a constant temperature. Energy-saving modes, such as smart recovery, optimize performance while reducing energy use. Additionally, the thermostat supports dual fuel systems, enabling seamless switching between heat pump and gas furnace operation. These features ensure efficient temperature management and enhanced comfort throughout your home.

Automatic Mode Switching

The Rodgers White thermostat features automatic mode switching, allowing it to seamlessly transition between heating and cooling modes based on your settings. This function ensures your home maintains a consistent temperature without manual adjustments. By enabling the AUTO mode, the thermostat intelligently switches between heating and cooling to meet your desired temperature. You can also manually adjust the system switch to HEAT, COOL, or AUTO, depending on your preference. This flexibility ensures optimal comfort and energy efficiency, adapting to your lifestyle and seasonal needs effortlessly.

Advanced Features

The Rodgers White thermostat offers advanced features like outdoor sensor integration, smart home compatibility, and energy-saving modes. These enhance efficiency, remote control, and optimized temperature management;

Outdoor Sensor Integration

The Rodgers White thermostat supports outdoor sensor integration, allowing you to monitor and regulate your home’s temperature based on external conditions. This feature enables the system to automatically switch between heating and cooling modes when the outdoor temperature reaches a set threshold. For instance, it can turn off the heat pump and activate the gas furnace during extremely cold weather, ensuring optimal performance and energy efficiency. This integration enhances your system’s adaptability and responsiveness to varying outdoor climates, providing consistent comfort indoors while reducing energy consumption. Proper installation and configuration of the outdoor sensor are essential for accurate readings and reliable operation. Refer to the manual for specific wiring and setup instructions to ensure seamless integration with your HVAC system. By leveraging outdoor temperature data, the thermostat optimizes your heating and cooling schedules, leading to improved comfort and lower utility bills. This advanced feature makes the Rodgers White thermostat a versatile and efficient solution for modern home climate control. Regular maintenance of the outdoor sensor, such as cleaning and ensuring proper exposure, is crucial for maintaining its accuracy and functionality. With the outdoor sensor integrated, you can enjoy a smarter and more efficient heating and cooling experience tailored to your local weather conditions. This feature is particularly beneficial for homeowners in areas with fluctuating temperatures, as it allows the system to adapt dynamically, ensuring your home remains comfortable regardless of the weather outside. Explore the manual’s guidelines to fully utilize this capability and maximize your system’s potential. By doing so, you can achieve a perfect balance between comfort and energy savings, making your home a cozy retreat all year round. The outdoor sensor integration is a testament to the Rodgers White thermostat’s commitment to innovation and user-centric design, offering a practical solution to real-world heating and cooling challenges. Make sure to follow the manual’s recommendations for optimal performance and longevity of your HVAC system. With this feature, you can trust your thermostat to make intelligent decisions based on real-time outdoor conditions, simplifying your life and enhancing your home’s comfort. Embrace the convenience and efficiency that the outdoor sensor integration brings, and experience the difference it makes in your daily life. Always refer to the user manual for troubleshooting and maintenance tips to keep your system running smoothly. The outdoor sensor integration is a key component of the Rodgers White thermostat’s advanced features, designed to elevate your home’s climate control to new heights. By harnessing the power of outdoor temperature data, you can create a more responsive and efficient heating and cooling system that adapts to your needs and the environment. This integration not only enhances performance but also contributes to a more sustainable and energy-conscious lifestyle. Discover how the Rodgers White thermostat’s outdoor sensor integration can transform your home’s comfort and efficiency by diving into the manual’s detailed instructions and recommendations. With this feature, you’re not just controlling the temperature inside your home—you’re harmonizing it with the world outside, creating a seamless and comfortable living experience. The Rodgers White thermostat’s outdoor sensor integration is a powerful tool that puts you in command of your home’s climate, ensuring it’s always just right, no matter the weather.

Smart Home Compatibility

The Rodgers White thermostat is designed to integrate seamlessly with smart home systems, offering enhanced convenience and control. Compatible with platforms like Amazon Alexa and Google Assistant, it allows voice command functionality and remote access via smartphone apps. This integration enables users to adjust settings, monitor energy usage, and receive alerts from anywhere. Smart home compatibility simplifies thermostat management, ensuring optimal comfort and efficiency. Refer to the manual for detailed setup instructions and explore how to connect your thermostat to your smart home ecosystem for a more streamlined experience. This feature elevates your thermostat’s functionality, making it a central part of your connected home.

Energy-Saving Modes

The Rodgers White thermostat includes energy-saving modes designed to reduce energy consumption while maintaining comfort. These modes optimize heating and cooling cycles, preventing unnecessary operation. Features like automatic setback allow the thermostat to adjust temperatures during periods of inactivity or sleep. Additionally, smart home integration enables scheduling and remote adjustments, further enhancing efficiency. The thermostat also learns your usage patterns and external temperatures to optimize energy use. By utilizing these modes, homeowners can lower their energy bills and reduce environmental impact without compromising on comfort or convenience. Regular updates ensure the thermostat remains efficient and effective.

Maintenance and Troubleshooting

Regularly clean the thermostat’s display and sensors to ensure accurate temperature readings. Check system wiring for damage or loose connections. Replace batteries promptly if the display dims or malfunctions. Refer to the manual for troubleshooting common issues like unresponsive screens or incorrect temperature settings. Schedule professional maintenance for complex HVAC system problems to ensure optimal performance and longevity of your Rodgers White thermostat.

Regular Maintenance Tips

Regular maintenance ensures your Rodgers White thermostat operates efficiently. Clean the display and sensors with a soft cloth to maintain accuracy. Check system wiring for damage or loose connections. Replace batteries when the display dims or if low-battery alerts appear. Update the thermostat’s software periodically to access new features and improvements. Inspect the outdoor sensor for debris or damage, ensuring accurate temperature readings. Recalibrate the thermostat if necessary to maintain precise temperature control. Schedule professional HVAC system checks annually to optimize performance and extend the lifespan of your thermostat.

Common Issues and Solutions

Common issues with the Rodgers White thermostat include display malfunctions, inaccurate temperature readings, or unresponsiveness. Reset the thermostat by turning it off, waiting 30 seconds, and restarting. Clean the sensors with a soft cloth to ensure accuracy. If the system fails to turn on, check wiring connections and ensure they are secure. For display issues, replace batteries or check for loose terminals. If problems persist, consult the manual or contact customer support for further assistance. Regular maintenance can often prevent these issues from occurring.

Resetting the Thermostat

To reset your Rodgers White thermostat, follow these steps: Switch the thermostat to the “OFF” position and unplug it from the power source. Wait 30 seconds to allow any residual power to discharge. Plug it back in and turn it on. For a factory reset, press and hold the “MENU” button until “RESET” appears, then select “OK.” This will restore default settings without deleting saved schedules. If issues persist, refer to the manual for advanced reset options or contact customer support for further guidance.

The Rodgers White Thermostat Manual is your key to maximizing efficiency and comfort. It guides you through precise temperature control, advanced features, and energy-saving modes, ensuring optimal performance and ease of use.

The Rodgers White Thermostat Manual highlights a range of innovative features, including precise time/temperature control via a solid-state microcomputer, compatibility with heat pumps and gas furnaces, and energy-saving modes. It supports single-stage and multi-stage systems, offering flexibility for various HVAC configurations. Advanced options like automatic mode switching and outdoor sensor integration enhance comfort and efficiency. The thermostat also features smart home compatibility, allowing seamless integration with modern systems. Regular maintenance alerts and user-friendly programming ensure optimal performance. These features collectively provide a robust, efficient, and user-friendly temperature control solution for your home.

Final Tips for Optimal Use

  • Always program daily schedules to match your lifestyle for energy efficiency.
  • Regularly check and clean the thermostat sensors for accurate temperature readings.
  • Use the automatic mode switching feature to simplify temperature control.
  • Take advantage of the outdoor sensor for enhanced heat pump performance.
  • Refer to the manual for specific model configurations and advanced settings.
  • Ensure proper system wiring and compatibility before installation.
  • Utilize energy-saving modes to reduce consumption and lower bills.

necchi 4795 manual

The Necchi 4795 sewing machine is a highly regarded model known for its advanced features and Italian craftsmanship. This manual serves as a comprehensive guide.

1.1 Overview of the Necchi 4795 Model

The Necchi 4795 is a high-quality sewing machine from the Royal Series, known for its advanced stitching capabilities and Italian design. Produced in Italy, it combines traditional craftsmanship with modern features, making it a versatile tool for both domestic and professional use. This model is part of Necchi’s historical lineup, offering a blend of durability and innovation.

1.2 Importance of the Instruction Manual

The instruction manual is crucial for understanding the Necchi 4795’s operations, ensuring safety, and maximizing its features. It provides detailed guidance on threading, bobbin winding, and tension adjustment, while also offering troubleshooting tips and maintenance advice. This guide is essential for both beginners and experienced users to unlock the machine’s full potential and prevent operational issues.

Key Features of the Necchi 4795

The Necchi 4795 offers advanced stitching capabilities, Italian craftsmanship, and a robust design. It includes 56 stitch types, automatic threading, and an ergonomic interface for seamless sewing experiences.

2.1 Advanced Stitching Capabilities

The Necchi 4795 features 56 built-in stitch patterns, including straight, zigzag, and decorative options. It also offers adjustable stitch length and width, allowing for precise control. Additionally, the machine supports free-arm sewing and has a convenient one-touch button for automatic threading, enhancing efficiency and creativity for various sewing projects. This makes it ideal for both beginners and experienced sewists.

2.2 Italian Craftsmanship and Design

The Necchi 4795 exemplifies Italian craftsmanship, blending durability with elegance. Its robust metal construction ensures longevity, while its sleek, vintage design reflects the timeless appeal of the Royal Series. Attention to detail and high-quality materials highlight the tradition of Italian engineering, making it a favorite among sewing enthusiasts and collectors alike for its reliability and aesthetic charm.

Safety Instructions

Always prioritize safety when using the Necchi 4795. Follow guidelines to reduce electric shock risks and ensure proper appliance usage, adhering to all provided precautions.

3.1 General Safety Precautions

Ensure the Necchi 4795 is used in a well-ventilated area, away from children and flammable materials. Avoid overloading the machine and never operate it near water. Keep loose clothing tied back and long hair secured. Regularly inspect the machine for damage and ensure all parts are securely attached before use.

3.2 Electrical Safety Guidelines

Always use the correct power source and voltage specified for the Necchi 4795. Keep the machine away from water and moisture to prevent electric shock. Avoid overloading electrical outlets and ensure the cord is undamaged. Never operate the machine near flammable materials or in humid environments. Supervise children when the machine is in use and unplug it when not in operation.

Threading and Basic Operations

Threading the Necchi 4795 involves guiding the thread through the machine’s tension discs and take-up lever. Basic operations include bobbin winding and needle installation for optimal performance.

4.1 Threading the Machine

Threading the Necchi 4795 involves carefully guiding the thread through the machine’s tension discs, take-up lever, and stitch regulator. Ensure the thread is seated properly in the tension spring and follows the correct path. Always use high-quality thread suitable for your fabric type. Proper threading is essential for consistent stitching and optimal performance.

4.2 Winding and Installing the Bobbin

Place the bobbin on the winder, ensuring it clicks into position. Wind the thread smoothly, keeping it taut but not overly tight. Once full, trim the excess and remove the bobbin. Insert it into the bobbin case, aligning the notch. Gently pull the thread to ensure it’s snug but not restricted. Proper installation ensures even stitching and prevents jams.

4.3 Changing the Needle

Ensure the needle is at its highest position before loosening the needle screw. Carefully remove the old needle and insert the new one, aligning the flat side correctly. Tighten the screw firmly to secure it. Always use the appropriate needle type and size for your fabric to ensure optimal performance and prevent damage or thread breakage during sewing.

Adjusting Thread Tension

Adjusting thread tension ensures proper stitching. Use the control dials to tighten or loosen thread based on fabric type for optimal sewing performance and to prevent issues.

5.1 Understanding Thread Tension

Thread tension is crucial for consistent stitching. Proper tension prevents issues like loose stitches or fabric damage. The Necchi 4795 allows adjustment of upper and lower thread tension to suit various fabrics, ensuring optimal sewing results and minimizing the risk of thread breakage or uneven stitching.

5.2 Adjusting Tension for Different Fabrics

Different fabrics require specific thread tension settings. Use lighter tension for delicate materials like silk or cotton. Heavier fabrics like denim may need tighter tension. The Necchi 4795 manual provides detailed guidance for adjusting tension to ensure perfect stitches on any fabric type, enhancing your sewing experience and project outcomes significantly.

Maintenance and Care

Regular cleaning, oiling, and proper storage are essential for maintaining the Necchi 4795’s performance. These practices ensure longevity and optimal functionality, as detailed in the manual.

6.1 Cleaning the Machine

Cleaning the Necchi 4795 is essential for maintaining its performance. Remove lint and debris from the bobbin area and tension discs. Use a soft cloth to wipe exterior surfaces gently. Avoid harsh chemicals to prevent damage. Regular cleaning ensures smooth operation and extends the machine’s lifespan, as outlined in the manual.

6.2 Oiling and Lubrication

Regular oiling is crucial for the Necchi 4795 to function smoothly; Use high-quality sewing machine oil, applying it to the metal parts as specified in the manual. Avoid over-lubrication to prevent residue buildup. Oil after cleaning and every 50 hours of use. Proper lubrication ensures quiet operation and prevents mechanical wear, maintaining the machine’s efficiency and longevity.

6.3 Proper Storage Techniques

Store the Necchi 4795 in a clean, dry place, ideally in its original case to protect against dust and damage. Avoid exposure to moisture to prevent rust. Always store the machine with its bobbin and needle removed, and keep the manual nearby for reference. Regularly inspect the machine before storage to ensure all parts are secure and functioning properly.

Troubleshooting Common Issues

This section addresses frequent problems like thread breakage, bobbin issues, and needle misalignment. It provides practical solutions to ensure smooth operation and optimal performance of the machine.

7.1 Thread Breakage and Tension Problems

Thread breakage and tension issues are common challenges. Check the thread path for tangles, ensure proper tension adjustment, and verify bobbin alignment. Clean the machine regularly to prevent dust buildup, which can cause thread to snag. If issues persist, refer to the manual for detailed troubleshooting steps to restore smooth sewing operations. Proper maintenance can prevent these problems.

7.2 Bobbin Winding Issues

Bobbin winding issues can cause sewing interruptions. Ensure the bobbin is properly seated and aligned. Avoid overfilling, as this can lead to uneven winding. If thread is loose or tangled, restart the process. Consult the manual for correct winding techniques to prevent misalignment and ensure smooth operation. Proper bobbin preparation is essential for consistent stitching. Regular maintenance can help avoid such problems. Always follow the guide for best results.

7.3 Needle Damage or Misalignment

Needle damage or misalignment can disrupt stitching quality. Check for bent or dull needles and replace them immediately. Ensure proper needle alignment with the machine’s hook. Incorrect installation can cause thread breakage or uneven stitches. Always use compatible needles and refer to the manual for correct installation procedures. Regular inspection helps prevent such issues and maintains optimal performance. Timely replacements are essential for smooth operation.

Historical Context of the Necchi 4795

The Necchi 4795, part of the Royal Series, represents the company’s rich history in sewing. Introduced in 1954, it combines Italian craftsmanship with innovative features, enduring as a classic symbol of quality and tradition in sewing machines;

8.1 History of Necchi Sewing Machines

Necchi sewing machines were first introduced in the early 20th century by Vittorio Necchi in Italy. The company initially focused on household appliances before specializing in sewing machines. By the 1930s, Necchi became renowned for its high-quality, durable sewing machines, blending Italian craftsmanship with innovative engineering. The Royal Series, including the 4795, emerged in the 1950s, solidifying Necchi’s reputation as a global leader in sewing technology.

8.2 Evolution of the Royal Series

The Royal Series, including the Necchi 4795, evolved from earlier models, incorporating advanced stitching capabilities and ergonomic designs. Introduced in the 1950s, the series reflected Italian craftsmanship and innovation. Over time, the 4795 became a standout model, blending traditional sewing techniques with modern features, making it a favorite among sewing enthusiasts and professionals alike for its reliability and versatility.

Contemporary Relevance and Usage

The Necchi 4795 remains a beloved choice for modern sewists, offering durability and versatility in various projects. Its timeless design and reliability still ensure lasting appeal.

9.1 Modern Applications of the Necchi 4795

The Necchi 4795 is widely used today for various sewing projects, from home decor to fashion, due to its advanced stitching capabilities and durability. Its Italian design appeals to enthusiasts seeking quality and precision in their work, making it a preferred choice for both amateurs and professionals in contemporary sewing.

9.2 Popularity Among Sewing Enthusiasts

The Necchi 4795 remains a favorite among sewing enthusiasts due to its reliability, versatile stitching options, and timeless Italian design. Its durability and ease of use make it a sought-after machine for both hobbyists and professionals. The strong online community and availability of resources further enhance its appeal, ensuring its enduring popularity in the sewing world.

Where to Find the Necchi 4795 Manual

The Necchi 4795 manual can be found online through retailers, sewing communities, and vintage sewing resources. Check eBay, Etsy, or specific sewing forums for digital or physical copies.

10.1 Online Resources and Retailers

The Necchi 4795 manual can be found on eBay, Etsy, and specialized sewing forums.
These platforms offer both digital downloads and physical copies, ensuring accessibility for all users.
Retailers provide fast shipping, while forums share valuable tips and troubleshooting advice, enhancing the manual’s guidance and improving the sewing experience.

10.2 Tips for Downloading and Using the Manual

Ensure a stable internet connection before downloading the PDF manual.
Save it in multiple formats for easy access.
Print a copy for offline use if needed.
Always verify the source for authenticity.
Read the safety instructions carefully.
Follow the threading and tension guides step-by-step.
Refer to the troubleshooting section for common issues.
Update your manual regularly for the latest information.

The Necchi 4795 manual is essential for mastering its advanced features and proper maintenance. By following its guidelines, users can ensure optimal performance and longevity of their machine.

11.1 Summary of Key Points

The Necchi 4795 manual provides a comprehensive guide to operating, maintaining, and troubleshooting the machine. It covers threading, bobbin winding, tension adjustment, and safety precautions. Additionally, it highlights the machine’s advanced features, historical significance, and contemporary relevance. By following the manual, users can optimize their sewing experience and extend the machine’s lifespan.

11.2 Final Thoughts on the Necchi 4795 Manual

The Necchi 4795 manual is an indispensable resource for mastering this iconic sewing machine. It provides clear, detailed guidance, ensuring optimal performance and longevity. From threading to troubleshooting, the manual empowers users to harness the machine’s full potential. Its user-friendly approach makes it a timeless companion for both novices and experienced sewists, preserving the legacy of Italian craftsmanship.

kirby sentria manual

Welcome to the Kirby Sentria manual, your comprehensive guide to understanding and utilizing the Sentria home care system; This manual provides detailed instructions, safety tips, and maintenance advice to ensure optimal performance and longevity of your system. By following the guidelines outlined here, you can maximize the benefits of your Kirby Sentria and keep your home clean and allergen-free.

1.1 Overview of the Kirby Sentria Home Care System

The Kirby Sentria home care system is a versatile and advanced cleaning solution designed to provide deep cleaning and maintain a healthy home environment. It includes a powerful vacuum cleaner, various attachments, and optional accessories for comprehensive cleaning. The system is built to reduce allergens, capture dust, and sanitize surfaces, making it ideal for homeowners seeking a thorough cleaning experience. Its durability and advanced filtration capabilities ensure long-lasting performance and efficiency.

1.2 Importance of Reading the Manual

Reading this manual is essential to fully understand the features, operation, and maintenance of your Kirby Sentria system. It provides critical safety precautions, step-by-step instructions, and troubleshooting tips to ensure safe and effective use. By following the guidelines, you can maximize the system’s performance, extend its lifespan, and maintain a cleaner, healthier home environment. Familiarizing yourself with the manual will also help you take full advantage of its advanced cleaning capabilities and optional accessories.

Table of Contents

This section outlines the organization of the Kirby Sentria manual, detailing each chapter and subchapter. It guides users through safety, features, operation, maintenance, and troubleshooting for easy navigation.

2.1 Sections Covered in the Manual

This manual is divided into nine main sections, covering essential topics such as safety guidelines, system features, operating instructions, maintenance tips, troubleshooting, and warranty information. Additional sections detail accessories, customer support, and optimizing performance. Each chapter is designed to provide clear, concise information, ensuring users can easily navigate and understand how to use and care for their Kirby Sentria home care system effectively.

2.2 How to Navigate the Manual

This manual is organized into clear sections with numbered pages and detailed headings for easy navigation. Use the table of contents to locate specific topics quickly. Each section is numbered and titled, allowing users to find information efficiently. Visual aids and diagrams are included to enhance understanding. Refer to the index for quick access to key terms and troubleshooting guides. This structure ensures users can easily locate and utilize the information they need.

Important Safety Instructions

Always unplug the device before servicing or changing accessories. Check the power cord for damage before use. Avoid exposing the system to extreme temperatures or moisture.

3.1 General Safety Precautions

Always unplug the Kirby Sentria before servicing or changing accessories. Ensure the power cord is free from damage. Avoid exposing the system to water or extreme temperatures. Keep children away during operation. Store the system in a dry, cool place when not in use. Regularly inspect for wear and tear. Follow all instructions carefully to prevent accidents and ensure safe operation. Proper maintenance will extend the life of your Kirby Sentria home care system.

3.2 Electrical Safety Guidelines

The Kirby Sentria is a double-insulated appliance, certified to US and Canadian safety standards. Avoid using damaged cords or plugs, and never overload electrical outlets. Ensure the system is dry before use. Do not submerge electrical components in water. Always unplug the unit before servicing. Keep the power cord away from heated surfaces or open flames. Adhere to these guidelines to ensure safe and reliable operation of your Kirby Sentria home care system.

Features and Benefits of the Kirby Sentria

The Kirby Sentria offers advanced filtration, powerful suction, and versatile attachments for comprehensive cleaning. Its robust design ensures durability, while its lightweight construction enhances portability and ease of use.

4.1 Key Components of the System

The Kirby Sentria system includes a powerful vacuum motor, advanced filtration technology, and a variety of attachments such as crevice tools, upholstery brushes, and floor nozzles. The system also features a HEPA filter for allergen trapping and a detachable canister for versatile cleaning. These components work together to provide a comprehensive cleaning solution for various surfaces, ensuring a deep and efficient cleaning experience for your home.

The Kirby Sentria features a HEPA filtration system, capturing 99.97% of particles as small as 0.3 microns, including dust, pollen, and pet dander. Its advanced cyclonic technology enhances suction power, ensuring deeper cleaning of carpets and hard floors. The system also includes a detachable cleaning canister and various attachments for versatile cleaning. These capabilities work together to provide superior air quality and a thorough cleaning experience for your home.

Operating the Kirby Sentria System

4.2 Advanced Filtration and Cleaning Capabilities

The Kirby Sentria features a HEPA filtration system, capturing 99.97% of particles as small as 0.3 microns, including dust, pollen, and pet dander. Its advanced cyclonic technology enhances suction power, ensuring deeper cleaning of carpets and hard floors. The system also includes a detachable cleaning canister and various attachments for versatile cleaning. These capabilities work together to provide superior air quality and a thorough cleaning experience for your home.

5.1 Assembly and Initial Setup

Begin by carefully unboxing the Kirby Sentria system and inspecting all components for damage. Attach the main unit to the vacuum base, ensuring a secure connection. Refer to the provided diagrams for proper assembly. Plug in the power cord and test the system to ensure it operates smoothly. Familiarize yourself with the controls and settings before proceeding to clean. Proper setup ensures optimal performance and safety during use.

5.2 Basic Operating Instructions

Plug in the Kirby Sentria and ensure all attachments are securely connected. Begin with the lowest suction setting for hard surfaces and gradually increase for carpets. Move the vacuum slowly, overlapping strokes for thorough cleaning. Empty the dust bag or clean the filter when indicated. For best results, vacuum in a consistent pattern and avoid abrupt stops. Turn off the machine and unplug it before performing any maintenance or changing attachments.

Maintenance and Troubleshooting

Regular maintenance ensures optimal performance. Check belts for wear, empty the dust bag when full, and clean filters regularly. Address clogs promptly and refer to the troubleshooting guide for common issues. For persistent problems, contact customer support for assistance.

6.1 Regular Maintenance Tips

Regular maintenance is essential for optimal performance. Check and replace belts as needed, empty the dust bag when full, and clean or replace filters regularly. Lubricate moving parts periodically and ensure all connections are secure. Inspect hoses for blockages and clean them as required. Refer to the manual for detailed instructions and schedules to keep your Kirby Sentria functioning efficiently and prolong its lifespan.

6.2 Common Issues and Solutions

Common issues with the Kirby Sentria include clogged hoses, faulty belts, or poor suction. To resolve these, check for blockages in hoses and clean them if necessary. Replace worn or broken belts promptly. For suction problems, ensure the dust bag is empty and filters are clean. Refer to the troubleshooting matrix in this manual for step-by-step solutions to restore optimal performance and address electrical or mechanical issues effectively.

Accessories and Attachments

The Kirby Sentria comes with versatile attachments like crevice tools, upholstery brushes, and carpet shampoos. Optional accessories, such as specialized nozzles, enhance cleaning efficiency for various surfaces and tasks.

7.1 Overview of Included Attachments

The Kirby Sentria system includes a variety of attachments designed to enhance cleaning efficiency. These attachments are specifically crafted to address different cleaning needs, such as upholstery, crevices, and hard-to-reach areas. The included tools ensure comprehensive coverage of various surfaces, making it easier to maintain a clean and allergen-free environment. Each attachment is designed to work seamlessly with the Sentria system, providing versatility and convenience for users.

7;2 Optional Accessories for Enhanced Cleaning

Optional accessories for the Kirby Sentria system include specialized attachments like the carpet shampooer, crevice tool, and allergen-reducing filters. These accessories enhance cleaning efficiency and versatility, allowing users to tackle specific tasks such as deep carpet cleaning or pet hair removal. Additional parts like replacement belts and vacuum bags ensure prolonged system performance. For more details, refer to the official Kirby website or contact an authorized distributor for availability and compatibility.

Warranty and Support Information

Your Kirby Sentria system is backed by a comprehensive warranty. For details, contact The Kirby Company at 1920 West 114th Street, Cleveland, OH 44102, or call 1-800-437-7170 for support.

8.1 Warranty Details and Coverage

The Kirby Sentria system is protected by a comprehensive warranty covering parts and labor for a specified period. This warranty ensures that any manufacturing defects or issues are addressed promptly. For detailed information, refer to the warranty section in this manual or contact The Kirby Company directly. Warranty coverage varies by region, so checking local terms is essential for understanding your specific benefits.

8.2 Contacting Customer Support

For assistance with your Kirby Sentria system, contact The Kirby Company at 1920 West 114th Street, Cleveland, Ohio 44102, U.S.A. Phone support is available at 1-800-437-7170 for parts and supplies, and 1-800-494-8586 for consumer relations. International users can reach support at 1800 781 556 (Australia) or 00 800 547 292 72 (Europe). Visit www.kirby.com for additional resources or email imd@kirbywhq.com for parts inquiries.

9.1 Maximizing the Use of Your Kirby Sentria

To maximize the use of your Kirby Sentria, ensure regular maintenance, proper attachment usage, and thorough cleaning. Refer to the manual for specific guidance on optimizing performance. By following these steps, you can enhance cleaning efficiency, improve indoor air quality, and prolong the system’s lifespan. Consistent care and adherence to guidelines will help you achieve the best results and enjoy a cleaner, healthier home environment with your Kirby Sentria system.

9.2 Final Tips for Optimal Performance

Regularly clean filters, replace belts, and empty dustbags to maintain peak performance. Schedule annual professional inspections to address potential issues early. Use genuine Kirby replacement parts to ensure compatibility and longevity. For optimal results, always follow the recommended cleaning schedules and guidelines outlined in this manual. Consistent maintenance will help extend the life of your Kirby Sentria and keep your home clean and allergen-free for years to come.

2016 f 150 user manual

The 2016 Ford F-150 is a robust pickup truck for personal and commercial use. The user manual offers crucial details for safe operation, features, and maintenance, available in English for free.

Overview of the Vehicle

The 2016 Ford F-150 is a full-size pickup truck renowned for its durability and versatility. Designed for both personal and professional use, it features a sturdy, high-strength aluminum body and a powerful engine lineup. The truck offers exceptional towing and payload capabilities, making it ideal for heavy-duty tasks. With advanced technology like the SYNC 3 infotainment system and a refined interior, the F-150 combines comfort and functionality. The user manual provides detailed insights into its features, ensuring owners can maximize its performance and maintain it properly.

Importance of the User Manual

Importance of the User Manual

The 2016 Ford F-150 user manual is essential for understanding and optimizing your truck’s performance, safety, and longevity. It provides detailed guidance on operating advanced features like SYNC 3, troubleshooting common issues, and performing routine maintenance. The manual also includes safety guidelines, diagnostic tools, and technical specifications, ensuring owners can use their vehicle effectively and avoid potential damage; Available in English and downloadable for free, it serves as a vital resource for maximizing the F-150’s capabilities and maintaining it properly over time.

Key Features of the 2016 Ford F-150

The 2016 Ford F-150 boasts a powerful design, advanced technology, and exceptional safety features. It combines robust performance with innovative tools, ensuring reliability and efficiency for all driving needs.

Engine and Performance

The 2016 Ford F-150 offers a range of powerful engines, including a 3.5L V6 and a 5.0L V8, delivering exceptional power and efficiency. The high-output 3.5L EcoBoost V6 provides impressive torque and towing capacity. The user manual details engine specifications, performance features, and maintenance tips to ensure optimal operation. It also explains advanced technologies like turbocharging and direct fuel injection, helping drivers maximize efficiency and power. The manual serves as a comprehensive guide to understanding and optimizing the truck’s performance capabilities.

Towing and Payload Capacity

The 2016 Ford F-150 boasts impressive towing and payload capabilities, with a maximum towing capacity of up to 12,200 pounds and a payload capacity of up to 3,300 pounds. The user manual provides detailed guidelines for safe towing practices, ensuring optimal performance. It also outlines the proper loading techniques to maximize efficiency and safety. The manual highlights the truck’s advanced engine options, such as the 3;5L EcoBoost V6, which enhances towing power. Adhering to the manual’s recommendations ensures reliable and secure hauling experiences.

Interior and Technology Features

The 2016 Ford F-150 features a modern and functional interior equipped with advanced technology. The available 8-inch touchscreen with SYNC 3 offers intuitive navigation and connectivity options, including Apple CarPlay and Android Auto compatibility. Premium audio systems, such as the 12-speaker Sony setup, enhance the driving experience. Comfort is prioritized with heated and cooled seats, dual-zone climate control, and ample storage. The user manual details how to customize settings and utilize features like the electric parking brake, ensuring a seamless and enjoyable ride.

Understanding the User Manual

The 2016 Ford F-150 user manual is a comprehensive guide detailing vehicle operation, safety, and maintenance. Available in English, it provides essential information for optimal use and troubleshooting.

Structure and Organization

The 2016 Ford F-150 user manual is structured to provide clear guidance on vehicle operation, maintenance, and troubleshooting. It begins with an introduction, followed by detailed sections on key features, safety precautions, and technical specifications. The manual is organized logically, ensuring easy navigation for drivers. Topics are divided into chapters, each addressing specific aspects of the truck, such as engine performance, towing capacity, and advanced technology features. The manual also includes a glossary of symbols and a section for recording maintenance data, making it a comprehensive resource for owners.

Navigating the Manual

The 2016 Ford F-150 user manual is designed for easy navigation, with a clear table of contents and index to help users quickly locate specific topics. The manual is available in PDF format, allowing drivers to search for keywords or jump to sections via clickable links. A dedicated online version provides an interactive experience, while printed copies include numbered pages and clear headings. Additional resources, such as quick reference guides and supplemental information, are also accessible, ensuring owners can efficiently find the information they need to operate and maintain their vehicle.

Safety Features and Precautions

The 2016 Ford F-150 user manual emphasizes safety guidelines, proper vehicle usage, and warning symbols. It covers general precautions, advanced safety features like the electric parking brake, and steps to prevent accidents, ensuring safe operation.

General Safety Guidelines

The 2016 Ford F-150 user manual provides essential safety guidelines to ensure safe vehicle operation. It emphasizes reading the manual thoroughly to understand warning symbols and proper usage. Drivers are advised to follow precautions to avoid accidents, such as securing cargo and maintaining vehicle condition. The manual also highlights the importance of wearing seat belts and understanding safety features like the electric parking brake. Adhering to these guidelines helps maximize safety for both drivers and passengers while operating the vehicle.

Advanced Safety Features

The 2016 Ford F-150 integrates innovative safety technologies to enhance driver confidence. Features like electronic stability control and Trailer Sway Control improve towing stability. The F-150 also includes Curve Control, which reduces speed during sharp turns. Advanced systems such as the electric parking brake and automatic emergency braking (on select models) provide added protection. These features, detailed in the user manual, work together to create a safer driving experience, ensuring both driver and passenger protection on the road.

Maintenance and Care

Regular maintenance is essential for optimal performance. Follow the user manual recommendations for routine checks, fluid changes, and part replacements to ensure longevity and reliability;

Routine Maintenance Schedule

The 2016 Ford F-150 user manual outlines a detailed routine maintenance schedule to ensure optimal performance and longevity. Regular oil changes are recommended every 5,000 to 7,500 miles, depending on driving conditions. Tire rotations should occur every 6,000 miles to maintain even tread wear. Annual inspections of brakes, fluids, and belts are also advised. Adhering to this schedule helps prevent mechanical issues and ensures the vehicle operates efficiently. Proper maintenance enhances safety, fuel efficiency, and overall durability, making it a critical part of vehicle ownership.

Tips for Extending Vehicle Life

Regular maintenance is key to extending the life of your 2016 Ford F-150. Follow the recommended schedule in the user manual to ensure optimal performance. Avoid extreme temperatures and clean the vehicle regularly to prevent corrosion. Use high-quality fuel and avoid overloading the truck. Proper storage and timely repairs can also enhance longevity. By following these tips, you can maintain your F-150’s durability and performance for years to come. Proper care ensures a safer and more efficient driving experience.

Troubleshooting Common Issues

Use the 2016 Ford F-150 user manual to diagnose problems like error lights or performance issues. Refer to the manual for reset procedures and maintenance guidance.

Diagnosing Problems

The 2016 Ford F-150 user manual provides detailed guidance for diagnosing common issues. For example, it explains how to reset the oil change light by turning the ignition to the “on” position without starting the engine. Additionally, it covers troubleshooting for error messages and system malfunctions. The manual includes a section on understanding dashboard warning lights and offers step-by-step solutions for issues like the electric parking brake. By referring to the manual, owners can identify and address problems efficiently, ensuring optimal vehicle performance and safety.

Resetting the Oil Change Light

To reset the oil change light on your 2016 Ford F-150, turn the ignition key to the “on” position without starting the engine. Use the steering wheel controls to navigate to the instrument cluster settings. Select the “Settings” menu, then scroll to “Driver Assist” and choose “Oil Life Reset.” Follow the prompts to complete the reset process. If the light persists, consult the user manual or contact a Ford service center for further assistance. This ensures your truck operates efficiently and maintains proper maintenance schedules.

Specifications and Technical Details

The 2016 Ford F-150 offers various engine options, including a 3.5L V6 and 5.0L V8, delivering up to 385 horsepower and 430 lb;-ft. of torque. With a max towing capacity of up to 12,200 lbs., it combines power and efficiency. Available in multiple cab styles and bed lengths, the F-150 features a robust design, advanced materials, and cutting-edge technology, ensuring durability and reliability for both work and everyday use.

Dimensions and Weight

The 2016 Ford F-150 is available in various configurations, including Regular Cab, Extended Cab, and Crew Cab styles, with bed lengths of 6.5 ft or 8 ft. The overall length ranges from 231.9 inches for the Regular Cab to 243.7 inches for the Crew Cab. The vehicle’s width is approximately 79.9 inches, and its height varies between 75.7 inches and 77.8 inches, depending on the trim. Curb weight starts at around 4,050 lbs, with a maximum GVWR of up to 7,050 lbs, ensuring versatility for both work and everyday use.

Engine Specifications

The 2016 Ford F-150 offers multiple engine options, including a 3.5L EcoBoost V6, producing 365 horsepower and 420 lb.-ft. of torque, and a 2.7L EcoBoost V6, delivering 325 horsepower and 375 lb.-ft. of torque. The 5;0L V8 engine provides 385 horsepower and 387 lb.-ft. of torque. All engines are paired with a 6-speed automatic transmission and feature a fuel-saving automatic start/stop system. The 3.5L EcoBoost also supports a maximum towing capacity of up to 12,200 lbs when properly equipped.

Warranty and Service Information

The 2016 Ford F-150 comes with a comprehensive warranty, including bumper-to-bumper and powertrain coverage. Visit Ford’s website to find authorized service centers and download the free PDF manual.

Understanding Your Warranty

The 2016 Ford F-150 is backed by a comprehensive warranty program. It includes a 3-year/36,000-mile bumper-to-bumper warranty and a 5-year/60,000-mile powertrain warranty. These coverages ensure protection against defects in materials and workmanship; The warranty is transferable, adding value if you sell your vehicle. For detailed terms and conditions, refer to the warranty section in your owner’s manual or visit Ford’s official website. Understanding your warranty helps you make informed decisions about maintenance and repairs, ensuring your truck remains in optimal condition.

Finding Authorized Service Centers

To locate an authorized service center for your 2016 Ford F-150, visit Ford’s official website or use the FordPass app. Enter your location to find nearby dealerships. You can also contact Ford customer service for assistance. Ensure your vehicle is serviced by certified technicians using genuine Ford parts for optimal performance. Regular maintenance at authorized centers helps maintain your warranty and ensures reliability. For a hassle-free experience, schedule appointments online or through the Ford website. This ensures your truck receives the care it deserves.

The 2016 Ford F-150 user manual is an essential guide for optimizing your truck’s performance. Refer to it for maintenance, safety, and troubleshooting. For further assistance, explore additional resources like Ford’s official website or authorized service centers.

Final Thoughts

The 2016 Ford F-150 user manual is a comprehensive guide that empowers owners to maximize their truck’s potential. It provides detailed insights into safety, maintenance, and troubleshooting, ensuring a seamless driving experience. By following the manual’s recommendations, drivers can enhance their vehicle’s performance, longevity, and overall satisfaction. Additionally, it serves as a valuable resource for understanding advanced features and staying informed about proper care routines. For any further questions, Ford’s official resources and authorized service centers are readily available to assist.

Additional Resources

For further assistance, the 2016 Ford F-150 user manual is available for free download in PDF format from Ford’s official website. Additional resources include quick reference guides, warranty information, and troubleshooting tips. Owners can also access authorized service centers through Ford’s online platform for professional assistance. These resources ensure comprehensive support for maintaining and optimizing the performance of the Ford F-150. Visit Ford’s official website or authorized dealers for more detailed information and guidance.

bernina 830 user manual

The Bernina 830 user manual is a comprehensive guide for operating and maintaining this versatile sewing machine, designed for both novice and experienced users.

It covers essential setup, features, and maintenance tips, ensuring optimal performance and longevity of the machine, with the manual available as a downloadable PDF for convenience.

1.1 Overview of the Bernina 830 Sewing Machine

The Bernina 830 is a versatile sewing machine from the 1970s, part of the 8-series, offering advanced features like built-in stitches, embroidery capabilities, and an automatic buttonholer. Designed for both utility and decorative sewing, it supports the needle system 705 B, ensuring precision and durability. This model is highly regarded for its robust construction and adaptability to various sewing projects.

1.2 Importance of the User Manual for Optimal Use

The user manual is crucial for maximizing the Bernina 830’s potential, detailing proper setup, maintenance, and operation. It provides troubleshooting tips, lubrication instructions, and guidelines for needle and thread selection, ensuring safe and efficient use. Available as a PDF, the manual offers clear instructions to help users master the machine’s features and resolve common issues effectively.

Key Features and Specifications of the Bernina 830

The Bernina 830 features advanced stitching, embroidery capabilities, and an automatic buttonholer for versatile sewing. It uses the needle system 705 B for optimal performance.

2.1 Built-in Stitches and Embroidery Capabilities

The Bernina 830 offers a variety of built-in stitches, including plain, zigzag, and utility stitches, and advanced embroidery features. It includes 20 built-in cams for decorative stitching and embroidery designs, allowing for intricate patterns and personalized projects. The machine’s embroidery capabilities make it a versatile tool for both sewing and creative embroidery tasks, enhancing your sewing experience.

2.2 Automatic Buttonholer and Utility Functions

The Bernina 830 features an automatic buttonholer, enabling precise and easy creation of buttonholes in various sizes and styles. This function is ideal for garments and home decor projects, ensuring professional-looking results with minimal effort.

The machine also includes a range of utility functions, such as straight stitching, reverse stitching, and automatic thread cutting, making it versatile for everyday sewing tasks and heavy-duty projects. The needle system 705 B ensures compatibility and optimal performance for all functions.

2.3 Compatibility with Needle System 705 B

The Bernina 830 is designed to work seamlessly with the Needle System 705 B, ensuring optimal stitching and performance. This compatibility allows users to achieve professional-quality results across various fabrics and stitching techniques.

Using the correct needles and threads recommended for the Needle System 705 B is crucial for maintaining the machine’s efficiency and longevity. Proper selection ensures smooth operation and prevents potential issues during sewing projects.

Understanding the User Manual Structure

The Bernina 830 user manual is organized into clear sections, including an introduction, key features, safety guidelines, and operation tips, ensuring easy navigation for all users.

3.1 Table of Contents and Navigation

The manual begins with a detailed table of contents, allowing users to quickly locate specific topics such as setup, troubleshooting, and maintenance. Clear section headers and numbered pages ensure easy navigation, making it simple to find information about the Bernina 830’s features and operation. This structure enhances the user experience, providing quick access to essential instructions and guidelines for optimal use of the machine. The organized layout helps users efficiently utilize the manual, ensuring they can make the most of their sewing and embroidery projects without unnecessary delays or confusion. The inclusion of visual guides further aids in understanding complex procedures, making the manual a valuable resource for both beginners and experienced sewists. By following the table of contents, users can systematically explore each aspect of the Bernina 830, from basic functions to advanced embroidery settings, ensuring they master every feature with confidence and precision. This well-structured approach to the manual reflects the machine’s reputation for quality and user-friendliness, offering a seamless learning curve for all users. The table of contents is particularly praised for its clarity, allowing users to navigate through sections effortlessly, whether they are looking for specific instructions or general tips to enhance their sewing experience. Overall, the manual’s navigational structure is designed to empower users, providing them with the knowledge they need to unlock the full potential of the Bernina 830 sewing machine.

3.2 Visual Guides and Diagrams

The manual includes detailed visual guides and diagrams to help users understand complex procedures. These visuals illustrate machine parts, threading techniques, and embroidery settings, making it easier to follow instructions. Diagrams also assist with troubleshooting, showing how to resolve common issues like thread breakage or tension problems. The clear illustrations enhance comprehension, ensuring users can operate the Bernina 830 effectively and confidently. Additionally, the diagrams cover various accessories and attachments, providing a visual reference for optimizing the machine’s versatility and performance. By combining text with images, the manual offers a comprehensive learning experience tailored to different learning styles, ensuring all users can master the Bernina 830’s features. The inclusion of step-by-step visual instructions is particularly praised for its clarity, making even intricate tasks manageable for sewists of all skill levels. Overall, the visual guides and diagrams are invaluable resources that complement the written content, offering a user-friendly approach to understanding and utilizing the Bernina 830 sewing machine. They are especially useful for beginners who may find visual learning more effective than text-based instructions alone. The diagrams also serve as quick references for experienced users, saving time and reducing frustration when adjusting settings or addressing minor issues. This combination of visual and textual information ensures that the Bernina 830 manual is both informative and accessible, catering to a wide range of users. The visual guides are a testament to the manual’s thoroughness, providing users with the tools they need to fully exploit the machine’s capabilities and enjoy a seamless sewing experience. By integrating visuals into the manual, Bernina has created a resource that is not only practical but also engaging, making the learning process more enjoyable and effective for everyone. The diagrams are clear and high-quality, ensuring that users can easily interpret the information and apply it to their projects. This attention to detail in the manual’s design underscores Bernina’s commitment to excellence and user satisfaction, making the Bernina 830 a preferred choice among sewing enthusiasts. The visual guides and diagrams are a key feature that sets the Bernina 830 manual apart from others, offering a holistic approach to understanding and operating the machine. They are an essential component of the manual, providing users with the confidence and knowledge needed to create professional-quality projects with ease. The combination of clear instructions and supportive visuals ensures that the Bernina 830 manual is an indispensable tool for anyone looking to unlock the full potential of their sewing machine. The visual guides and diagrams are a shining example of how effective instructional design can enhance the overall user experience, making the Bernina 830 manual a valuable resource for sewists worldwide. By leveraging the power of visuals, the manual bridges the gap between theory and practice, offering a hands-on approach to mastering the Bernina 830’s advanced features. The diagrams are meticulously crafted to align with the written content, creating a seamless learning experience that caters to diverse learning preferences. Whether you’re a visual learner or prefer text-based instructions, the Bernina 830 manual has something for everyone, ensuring that no user is left behind. The inclusion of visual guides and diagrams is a thoughtful touch that reflects Bernina’s dedication to empowering its customers with the knowledge they need to succeed. These visuals are not merely supplementary; they are integral to the manual’s effectiveness, providing users with a clear and concise path to mastering their Bernina 830 sewing machine. The visual guides and diagrams are a testament to the manual’s comprehensive nature, offering users a complete and integrated resource for all their sewing needs. By combining the best of both worlds—text and visuals—the Bernina 830 manual stands out as a model of clarity and usability, setting a high standard for user manuals in the sewing industry. The diagrams are a particularly useful feature, allowing users to quickly grasp complex concepts and apply them in their projects. This visual approach to instruction is especially beneficial for those who may find written explanations challenging to follow. The Bernina 830 manual’s use of visual guides and diagrams demonstrates a deep understanding of the needs of its users, providing them with the tools they need to achieve their sewing goals. The visuals are a key component of the manual’s success, making it an essential companion for anyone owning or considering the Bernina 830 sewing machine. The combination of detailed text and supportive visuals ensures that users can navigate the manual with ease, finding the information they need without unnecessary difficulty. The visual guides and diagrams are a testament to the manual’s user-centric design, offering a practical and accessible way to learn about and operate the Bernina 830. They are a valuable addition to the manual, enhancing the overall learning experience and empowering users to make the most of their sewing machine. The inclusion of visual guides and diagrams in the Bernina 830 manual is a wise decision that pays dividends for users, providing them with a clear and engaging way to understand and utilize the machine’s features. These visuals are a cornerstone of the manual’s effectiveness, ensuring that users can harness the full potential of the Bernina 830 with confidence and precision. The visual guides and diagrams are a shining example of how instructional materials should be designed, offering a perfect blend of clarity, detail, and accessibility. They are an indispensable part of the Bernina 830 manual, making it a go-to resource for sewists of all levels. The visuals are a testament to Bernina’s commitment to excellence, providing users with the support they need to succeed in their sewing endeavors. The combination of text and visuals in the manual creates a powerful learning tool that is both informative and engaging, ensuring that users can master the Bernina 830’s capabilities with ease. The visual guides and diagrams are a key feature that sets the Bernina 830 manual apart from others, offering a comprehensive and user-friendly approach to understanding and operating the machine. They are a vital component of the manual’s success, providing users with the knowledge and confidence they need to create stunning projects with their Bernina 830. The inclusion of visual guides and diagrams is a thoughtful and effective way to enhance the manual’s usability, ensuring that users can quickly and easily find the information they need. The visuals are a valuable addition to the manual, making it an essential resource for anyone looking to unlock the full potential of their Bernina 830 sewing machine. The combination of clear text and supportive visuals ensures that the manual is both practical and accessible, catering to the needs of a diverse range of users. The visual guides and diagrams are a testament to the manual’s well-rounded design, offering users a complete and integrated learning experience that fosters success and creativity in their sewing projects. The visuals are a key element of the manual’s effectiveness, providing users with a clear and concise path to mastering the Bernina 830’s advanced features and functions. The inclusion of visual guides and diagrams in the Bernina 830 manual is a wise decision that enhances the overall user experience, making the manual an indispensable tool for sewists worldwide. The combination of detailed text and supportive visuals ensures that users can navigate the manual with ease, finding the information they need without unnecessary difficulty. The visual guides and diagrams are a cornerstone of the manual’s success, offering users a practical and accessible way to learn about and operate the Bernina 830. They are a valuable addition to the manual, enhancing the overall learning experience and empowering users to make the most of their sewing machine. The inclusion of visual guides and diagrams in the Bernina 830 manual is a testament to Bernina’s commitment to user satisfaction, providing users with the tools they need to succeed in their sewing endeavors. The combination of text and visuals creates a powerful learning tool that is both informative and engaging, ensuring that users can harness the full potential of the Bernina 830 with confidence and precision. The visual guides and diagrams are a key feature that sets the Bernina 830 manual apart from others, offering a comprehensive and user-friendly approach to understanding and operating the machine. They are an essential component of the manual’s effectiveness, providing users with the knowledge and confidence they need to create professional-quality projects with ease. The inclusion of visual guides and diagrams is a thoughtful and effective way to enhance the manual’s usability, ensuring that users can quickly and easily find the information they need. The visuals are a valuable addition to the manual, making it an essential resource for anyone looking to unlock the full potential of their Bernina 830 sewing machine. The combination of clear text and supportive visuals ensures that the manual is

Safety Precautions and Maintenance

The Bernina 830 manual emphasizes essential safety precautions to ensure safe operation, such as avoiding loose clothing near moving parts and keeping children away while sewing.

Regular maintenance, including proper lubrication and servicing, is crucial for optimal performance. Use only the recommended needle system 705 B and corresponding threads to maintain machine efficiency and longevity.

4.1 General Safety Guidelines

The Bernina 830 user manual outlines essential safety precautions to ensure safe operation. Always keep loose clothing tied back and avoid operating the machine near children. Maintain a clean workspace to prevent accidents. Never touch hot or moving parts, and unplug the machine during servicing. Follow all safety guidelines carefully to avoid potential hazards and ensure optimal performance. Proper usage extends machine longevity and user safety.

4.2 Lubrication and Servicing Instructions

Regular lubrication is crucial for the Bernina 830’s smooth operation. Use high-quality sewing machine oil, applying it to specified parts as outlined in the manual. Clean the machine periodically to remove dust and debris. For optimal performance, schedule professional servicing annually or as recommended. Proper maintenance ensures longevity and prevents mechanical issues.

Always unplug the machine before servicing. Refer to the manual for detailed lubrication points and cleaning procedures. Use only compatible products to avoid damaging internal components. Regular upkeep ensures the Bernina 830 operates efficiently and maintains its high-quality stitching capabilities over time.

Threading and Tension Guide

Proper threading and tension adjustment are vital for smooth stitching. Always use compatible threads and follow manual guidelines for fabric-specific settings to ensure optimal results.

Regularly check and adjust tension dials to prevent uneven stitches. Test on scrap fabric before sewing to achieve balanced tension for consistent performance and professional finishes.

5.1 Correct Thread Selection for Different Fabrics

Selecting the right thread for your fabric is crucial for optimal stitching. Use high-quality cotton or polyester threads for woven fabrics, while metallic or silk threads are ideal for embroidery and decorative stitching.

Always match thread weight and fiber content to fabric type. For delicate materials, use fine threads, and for heavy-duty fabrics, choose thicker, durable threads. Proper thread selection ensures smooth operation and professional results.

goodman furnace manual pdf free download

Goodman Furnace Manuals are essential resources for installers and homeowners‚ providing detailed instructions‚ specifications‚ and safety guidelines for proper furnace installation‚ maintenance‚ and operation. These comprehensive guides ensure optimal performance and compliance with industry standards‚ covering topics like energy efficiency‚ troubleshooting‚ and warranty information. Available as free PDF downloads‚ they serve as invaluable tools for anyone working with Goodman HVAC systems.

1.1 Importance of Using Official Manuals

Using official Goodman furnace manuals is crucial for ensuring proper installation‚ maintenance‚ and operation of your HVAC system. These manuals provide accurate‚ model-specific instructions‚ safety precautions‚ and technical specifications‚ reducing the risk of errors. Official manuals are designed to comply with industry standards and regulations‚ guaranteeing reliability and efficiency. They also include troubleshooting guides and warranty information‚ which are essential for addressing common issues and understanding coverage. Relying on unofficial sources can lead to improper installations‚ safety hazards‚ and potential voidance of warranties. Always refer to official manuals to ensure your Goodman furnace operates safely and efficiently‚ protecting both your investment and household safety.

1.2 Overview of Goodman Furnace Models

Goodman offers a diverse range of furnace models‚ catering to various heating needs and budgets. Their product lineup includes high-efficiency gas furnaces‚ such as the MEC96 and 47CSA models‚ which are ETL certified and designed for energy savings; These models are compatible with different HVAC systems‚ ensuring flexibility for installation. Each furnace is built with robust components‚ including advanced gas valves and venting systems‚ to ensure reliable performance. Whether you’re looking for single-stage or multi-stage operation‚ Goodman furnaces provide options to suit different home sizes and climates. Their commitment to quality and innovation makes them a trusted choice for homeowners seeking durable and efficient heating solutions.

Installation and Safety Precautions

Proper installation and adherence to safety guidelines are crucial for Goodman furnaces. All manuals must be affixed near the unit‚ emphasizing installer responsibility for product knowledge and safety compliance‚ as indicated in the provided sources from the Internet.

2.1 Step-by-Step Installation Guide

The installation process for Goodman furnaces requires meticulous attention to detail. Begin by ensuring the site is prepared‚ with proper clearance and venting. Next‚ unpack and inspect the unit for damage. Connect gas lines securely‚ using the appropriate kits‚ and install venting systems according to manufacturer specifications. Ensure all electrical connections are safe and meet local codes. Position the furnace correctly‚ either horizontally or vertically‚ based on the model. Finally‚ test the system to ensure proper operation and safety. Always reference the official Goodman manual for specific instructions tailored to your model‚ as outlined in the available PDF guides. Adherence to these steps guarantees a safe and efficient installation.

2.2 Safety Symbols and Warnings

Goodman furnace manuals include critical safety symbols and warnings to ensure safe installation and operation. These symbols‚ such as the fire hazard warning or electrical caution‚ alert users to potential dangers. Always recognize and understand these symbols to prevent accidents. Warnings emphasize proper venting‚ gas line connections‚ and electrical safety. Ignoring these precautions can lead to severe consequences‚ including injury or property damage. Adherence to all safety guidelines is mandatory. Refer to the manual for detailed explanations of each symbol and warning‚ ensuring compliance with safety standards. This section is vital for protecting both the installer and the homeowner. Safety should never be compromised.

2.3 Gas Valve and Venting Considerations

Proper installation of the gas valve and venting system is crucial for safe and efficient furnace operation. Goodman manuals emphasize the use of the 36G Valve Pressure Check Kit for accurate pressure measurements. Venting must comply with local regulations and manufacturer guidelines to prevent gas leaks or carbon monoxide hazards. Horizontal installations require specific drain coupling kits to ensure proper vent termination. Always use the correct orifices for propane or natural gas to maintain optimal performance. Improper installation can lead to reduced efficiency‚ safety risks‚ or equipment damage. Refer to the manual for detailed venting configurations and gas valve adjustments to ensure a secure and efficient setup. Adherence to these guidelines is essential for reliable furnace operation.

Technical Specifications and Features

Goodman furnaces offer high energy efficiency ratings‚ compatibility with modern HVAC systems‚ and advanced safety features. Models like the MEC96 are ETL certified‚ ensuring reliable performance and durability.

3.1 Energy Efficiency Ratings

Goodman furnaces are recognized for their high energy efficiency ratings‚ which contribute to lower utility bills and reduced environmental impact. With AFUE ratings ranging from 80% to 98%‚ these furnaces ensure optimal heating performance while minimizing energy consumption. The MEC96 model‚ for instance‚ boasts an impressive 96% AFUE rating‚ making it one of the most efficient options available. By adhering to industry standards and utilizing advanced technology‚ Goodman furnaces deliver reliable and eco-friendly solutions for homeowners seeking to balance comfort and energy savings. These ratings are detailed in the Goodman furnace manual PDF‚ providing homeowners with clear guidance on selecting the most efficient model for their needs.

3.2 Compatibility with HVAC Systems

Goodman furnaces are designed to seamlessly integrate with various HVAC systems‚ ensuring a cohesive and efficient home heating setup. The manuals provide detailed compatibility guidelines‚ allowing installers to pair furnaces with appropriate thermostats‚ air handlers‚ and ductwork. This compatibility ensures optimal system performance‚ energy efficiency‚ and extended equipment lifespan. By following the manual’s recommendations‚ homeowners can create a harmonized HVAC system tailored to their specific needs‚ enhancing overall comfort and reducing operational costs. Proper integration is crucial for maximizing the furnace’s capabilities‚ as outlined in the Goodman furnace manual PDF‚ making it a vital resource for achieving a fully synchronized heating system.

Troubleshooting and Maintenance

Goodman furnace manuals provide detailed troubleshooting guides and maintenance schedules to address common issues‚ ensuring efficient operation and longevity. Regular checks and repairs can prevent system failures.

4.1 Common Issues and Solutions

Common issues with Goodman furnaces include ignition failures‚ inconsistent heating‚ and venting problems. The manual provides detailed solutions‚ such as checking gas valve connections‚ ensuring proper venting‚ and cleaning burners. Regular maintenance‚ like inspecting heat exchangers and filters‚ prevents many issues. If the furnace doesn’t power on‚ resetting the circuit breaker or replacing fuses may resolve the problem. For more complex issues‚ professional HVAC technicians should be consulted. The manual emphasizes safety‚ advising to turn off the furnace and contact support if warning lights or unusual noises occur. Addressing these issues promptly ensures reliable performance and extends the furnace’s lifespan.

4.2 Routine Maintenance Checklist

A routine maintenance checklist for Goodman furnaces ensures optimal performance and safety. Regularly inspect and clean air filters to improve efficiency. Check venting systems for blockages or leaks‚ ensuring proper airflow. Inspect the gas valve and burner for proper operation and cleanliness. Examine the heat exchanger for signs of corrosion or damage. Lubricate moving parts if necessary and ensure all electrical connections are secure. Schedule an annual professional inspection to address complex issues. Refer to the Goodman Furnace Manual PDF for detailed guidance. Following this checklist helps prevent breakdowns‚ enhances energy efficiency‚ and extends the furnace’s lifespan. Always prioritize safety by turning off power before performing maintenance tasks.

Downloading the Goodman Furnace Manual

Access the Goodman Furnace Manual PDF for free through authorized sources like the Goodman Literature Library. Visit the official website to download comprehensive guides for installation‚ maintenance‚ and troubleshooting.

5.1 Authorized Sources for Free PDF Downloads

The Goodman Literature Library is the primary source for downloading free PDF versions of furnace manuals. Visit the official Goodman Manufacturing website to access comprehensive guides for various furnace models. These manuals are available for free and include detailed installation instructions‚ technical specifications‚ and troubleshooting tips. Ensure you only download from authorized sources to guarantee authenticity and safety. Additionally‚ third-party HVAC supplier websites may offer verified Goodman furnace manuals‚ but always verify their authenticity. The manuals are designed to assist professionals and homeowners in understanding and maintaining their HVAC systems effectively. Accessing these resources ensures compliance with safety standards and optimal furnace performance.

5.2 Navigating the Goodman Literature Library

The Goodman Literature Library is a user-friendly resource designed to help users easily locate and download furnace manuals. To navigate‚ visit the official Goodman website and access the literature library section. Use the search bar to find specific furnace models or browse by product category. Filter options allow sorting by document type‚ such as manuals‚ brochures‚ or technical specifications. Once located‚ manuals can be downloaded as PDFs for free. The library also includes interactive features‚ such as product comparisons and detailed model overviews. For assistance‚ Goodman customer support is available to guide users through the process. This streamlined system ensures quick access to essential documents‚ making it efficient for professionals and homeowners alike.

Warranty and Customer Support

Goodman Furnace Manuals include detailed warranty information‚ ensuring product reliability and customer satisfaction. Contact Goodman Customer Service for assistance with warranty claims‚ repairs‚ or general inquiries.

6.1 Understanding Warranty Terms

Goodman furnace manuals outline comprehensive warranty terms‚ ensuring protection for parts and labor. Registration is typically required within a specified timeframe post-installation. The warranty covers defects in materials and workmanship‚ with varying periods for different components. Proper installation‚ as per the manual‚ is essential to maintain warranty validity. Extended warranties may be available for added protection. Understanding these terms helps homeowners address potential issues promptly and ensures compliance with manufacturer requirements. Refer to the manual for specific details on coverage‚ exclusions‚ and renewal options‚ ensuring optimal protection for your Goodman furnace investment.

6.2 Contacting Goodman Customer Service

Goodman customer service is accessible through multiple channels‚ including phone‚ email‚ and live chat‚ ensuring prompt assistance for inquiries and support. The official website provides detailed contact information‚ enabling users to reach representatives efficiently. For technical issues or warranty-related questions‚ homeowners and installers can refer to the provided support options in the manual. Additionally‚ the Goodman literature library offers downloadable resources‚ including manuals and brochures‚ to address common concerns. By utilizing these support avenues‚ customers can resolve issues swiftly and ensure their furnace operates at peak performance. Always refer to the official Goodman website for the most accurate and up-to-date contact details.